Air conditioning on VAZ-2114: installation, operating instructions
The factory did not install air conditioning on the VAZ-2114; even the designers did not have such an idea. But the car, although created on the basis of the “nine” (which was popular over 25 years ago), still has a relatively attractive appearance and is in demand among consumers. A good level of sound insulation and a good engine allow you to install air conditioning on the fourteenth model.
It is advisable to install it on injection engines, since they are controlled electronically and operate stably, regardless of the load. If you try to install air conditioning on carburetor engines, you will experience dips when driving.
Generator VAZ 2114, 2115. Removal and installation
The operation of all electrical appliances and battery charging depend on the health of the generator in the car. In the event of a generator failure, the car will be powered by electricity from the battery, which is short-lived.
The process of replacing a generator on a VAZ 2114, 2115, 2113 can be carried out in a garage and on your own.
Previous posts from the category: VAZ 2114
Long gone are the days when there were few cars on city streets, and therefore few emergency situations. The simple braking system on cars of the 70s did not have a vacuum brake booster.
The ignition module is the fruit of improvement of AvtoVAZ products, in particular the Samara-2 line of cars.
The need to replace steering tips on a VAZ 2114, 2115, 2113 car will manifest itself by the appearance of knocks and other extraneous sounds from the front suspension.
Replacing a ball joint for a VAZ 2114, 2115, 2113 is a process that is one of the simplest in terms of suspension maintenance. It can be done in a garage with a minimum of tools.
The clutch cable is an important component. The correct operation of the clutch depends on its serviceability. Also, its correct operation allows you to maintain the serviceability of the gearbox and other transmission elements.
*Add article to bookmarks:
Replacing spark plug well seals VAZ 2114 1.5 16 cells. Part 1.
Replacing spark plug well seals VAZ 1.5 16V
removing spark plug wells, replacing rubber rings VAZ
Repair of VAZ 2112 16 head (valves part 2)
Replacing spark plug well rings (seals) and valve cover gaskets
Then you need to unscrew the fuel line fittings. It is considered disposable and it is better to replace it with a new one each time you remove it in order to avoid oil leaks. The developers of the ashtray who got behind the wheel of the Priora deserve a special thank you with a capital T and have every chance to quit the bad habit. All changes will be taken into account in subsequent editions.
After the liquid stops flowing out, then remove the front cover from the latches and unscrew it. Voltage is supplied to this device from the control electrical unit through a resistor; next time you can remove the glass in 1 minute, provided that you have spilled silicone on the joints. In my case, I unsoldered all the possible ones, and this is how I secured the coils to the body, to standard Volgov strips with long bolts to the TV. And there are many reasons for such love for these light sources. We remove the wheel, pull out the pins, then remove the block that does not work.
Electronic speed sensor installed on more modern versions of cars with an injector. In order to remove the piston group, you need to unscrew the nuts from the connecting rod bolts and remove the cover. Block heads with valve systems have fundamental differences.
Sources
- https://stomatol.pp.ua/generator-vaz-2114-2115/
- https://zeler.ru/vaz-2112/y64524-zamena-salnikov-svechnih-kolodtsev-vaz-2112-16-klapanov.php
Why is air conditioning needed?
For many motorists, installing an air conditioner on a VAZ-2114 is a pipe dream, but it is quite feasible. A significant increase in comfort is the answer to the question why it is needed. Of course, you can install a small fan or open the windows slightly. But fans are of no use in the heat, and through open windows dust, dirt, and exhaust gases from trucks passing nearby will enter the cabin.
And if you are driving along the highway, then when you open the windows there will be a lot of noise, which gets annoying very quickly. And installing an air conditioner on a VAZ-2114 will solve all problems with comfort.
- Reduce the temperature in the cabin.
- Heat the interior at a temperature of 5 to 15 degrees. Useful quality in autumn and spring.
- Dry the air inside the cabin.
If you turn on the air conditioner and heater at the same time, you can get rid of excess moisture and the windows will not fog up. This will benefit the car, as moisture can accumulate inside the cabin and cause corrosion. Heating occurs by changing the direction of movement of the refrigerant within the system. In this case, the external radiator will be cold and the internal radiator will be hot.
Air conditioning on a VAZ 2114 - a luxury or a necessity?
Should I install an air conditioner or not? This question is asked by many motorists, including owners of the 14th model. On the one hand, there is no urgent need for it (in fact, that’s why it is not included in the basic equipment of most cars). On the other hand, during summer trips, especially in extreme heat, the driver wants to be in the most comfortable environment possible.
Of course, you can simply open all the windows, but such a procedure does not always give the desired result, but a fair amount of dust and other debris can enter the cabin. That is why the idea of installing an air conditioner on 2114 is a pretty good one, and if the motorist has the means to implement it, then there is no point in postponing it.
Moreover, the climate system obtained as a result of such modernization can perform not one, but three main functions at once:
- air cooling;
- interior heating;
- reducing air humidity in the cabin (drying).
The air drying function allows you not only to forget about fogging up the windows, but also significantly reduces the risk of rust and corrosion on the metal elements of the interior.
Characteristics of climate control equipment
Most climate system models are similar in parameters. All of them are designed for use on specific car models. The main condition is sufficient power of the motor and generator. The following characteristics can describe the Frost air conditioner on the VAZ-2114:
- The compressor is driven by a pulley on the crankshaft. One belt drives the generator and compressor.
- Allows you to maintain the temperature in the range of 9-18 degrees.
- The difference between the temperature in the cabin and outside is 5-12 degrees.
- Per hour productivity is about 300 cubic meters. meters.
- The entire system operates on 12 Volt DC.
- Net power 2.1 kW.
- Freon R134A is used as a refrigerant (one of the most popular, it is used in all refrigeration equipment).
- In addition to freon, SP15 oil is poured inside.
FROST car air conditioners for VAZ Kalina, Priora and foreign cars (Renault, Chevrolet, Hyundai, Nexia, etc.)
FROST LLC produces air conditioners for Chevrolet, Ford, Lada and other Russian and foreign passenger cars.
The company is a supplier of components to the AvtoVAZ and Zaporozhye Automobile Plant car assembly plants, as well as to dealers of the UAZ and GAZ car plants. This ensures high quality products and affordable prices.
| Automobile model | Car air conditioner model |
| Air conditioning for VAZ 2110 | FROST 2170F-8100046-83 |
| Air conditioning for VAZ 2115, 2114, 2113, 21093 Samara | FROST 2115F-8100046-41 |
| Air conditioning for Granta (Lada 2190) | FROST 2190F-8100046-55 |
| Air conditioning for Kalina (Lada 1118 or 1119) | FROST 1118F-8100046-82 |
| Air conditioning for Priora (Lada 2170) | 2170F-8100046-83 |
| Air conditioning on a Chevrolet Niva | 21236F-8100046-55 |
| Air conditioner for Niva 4×4 (VAZ 21214) | 21214F-8100046-55 |
| Air conditioner for Lada Largus | LARGUS-8100046-82 |
| Air conditioner for Nexia | DNEXIA-8100046-82 |
| Car air conditioner for Daewoo Matiz | DMATIZ-8100046-00 |
| Air conditioner for Volkswagen Polo | VWPOLO-8100046-81VWPOLO-8100046-82 |
| Air conditioning on Lacetti, Lanos, Cruz or Aveo | please check availability by phone |
| Air conditioning for Renault Logan, Sandero, Duster and other models | please check availability by phone |
| Air conditioning for Ford Focus | please check availability by phone |
| Air conditioning for Ford Focus 2 | please check availability by phone |
| Air conditioning for Hyundai Accent, Solaris, Getz, Sonata | please check availability by phone |
Also on sale are air conditioners for combines.
and other special equipment.
General installation information
Be sure to follow the instructions in the instruction manual, as different air conditioner models have their own characteristics. If you do not have experience in installation work, it is better to entrust everything to professionals. But it should be noted that the price of an air conditioner for a VAZ-2114 is rather high - from 23 thousand rubles and above. And the installation service costs money, but there will be a guarantee that the installation will be competent.
- Evaporator installation.
- Installation of electrical wiring.
- Installation of the capacitor.
- Pulling hoses and tubes.
- Fastening of electrical wires.
- Compressor installation.
You need to be careful at every step - the slightest mistake will lead to the air conditioner not working properly. And the presence of microcracks in the tubes will cause refrigerant leakage. The price of an air conditioner for a VAZ-2114 is quite high, and not everyone wants to risk such equipment.
New: INDEL air conditioners
We offer to purchase a new product from our range – INDEL B SLEEPING WELL OBLO (24V) car air conditioner.
Advantages of the model: autonomy (does not require constant engine operation), low noise and vibration levels, compact installation, affordable price.
The air conditioner is equipped with a compressor from the famous Danfoss company. Warranty – 2 years.
Specifications:
- Dimensions of the indoor unit (WxHxD): 349x165x387 mm
- Dimensions of the outdoor unit (WxHxD): 865x193x605 mm
- Number of fan modes: 5 and 1 turbo mode
- Power: 24 V
- Current consumption: 7.5 to 15 A
- Cooling capacity: 2240 – 3250 BTU/h (650 – 950 W)
- Power consumption (Min. - Max.): 180 - 336 W
Evaporator installation and wiring
Before you do the entire installation yourself, ask how much it costs to install an air conditioner on a VAZ-2114 in good workshops. If the cost is not very high, then it is better to contact them. To install the evaporator, you must perform the following manipulations:
- Remove the rubber seal installed on the hood.
- Remove the plastic drain from the right side.
- Remove the heater housing and filter, fan (if necessary).
- The conditioner comes with guerlain. It must be glued as indicated in the instructions.
- Install the lower part of the evaporator.
- Reinstall the heater fan housing.
After completing the installation of the evaporator, you can run all the wires. Try to lay them so that exposure to heat and moisture is minimal (away from the exhaust system and the road surface):
- First remove the air purification filter and adsorber.
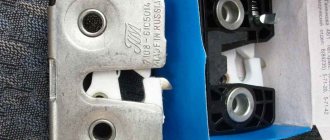
- Remove the cover from the mounting block.
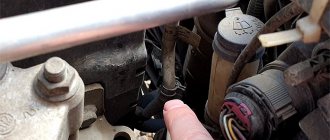
- The seals that are located on the headlight hydrocorrectors also need to be removed.
- Stretch the wire from the positive terminal of the battery to the consumers.
- The wires going to the fan and pressure sensor are laid second.
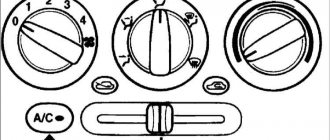
- The power button is installed on the dashboard in a location convenient for you.
- Connect the gray and orange wires on the heater switch.
- The temperature sensor must be installed in the hole through which the wiring goes to the heater fan.
- The thermostat is the last to be connected, you choose the location for its installation yourself, this is not critical.
Installation
Now all that’s left to do is install the equipment on your own car. Let's say right away that this is not so easy to do. Therefore, we strongly do not recommend starting work if you have no experience.
If you are used to repairing a car with your own hands, and have already managed to disassemble and assemble almost all the components of your VAZ 2114, then you can definitely handle it.
The work can be divided into six main stages:
- Evaporator installation;
- Installation of wiring;
- Installation of a capacitor;
- Installation of pipes;
- Wire fastening;
- Compressor installation.
Now let's talk about each stage separately.
Evaporator
To install the evaporator, refer to the following instructions:
- Remove the rubber seal from the hood of your car;
- Remove the plastic drain located on the right;
- Completely remove the stove filter, dismantling it together with the housing;
- Take the guerlain that comes with the air conditioner and glue it according to the instructions;
- Install the lower part of the evaporator;
- Mount the fan housing;
- Complete installation of the assembled evaporator.
Wiring
This is not the most difficult, but very important stage. The service life of the equipment depends on the quality and reliability of the wiring.
- Remove the air filter and dismantle the adsorber.
- Remove the lower protective cover of the mounting block.
- Remove the seals located on the headlight hydrocorrector.
- Pull the positive wire along the standard wiring bundle to the battery.
- Lay the wiring that goes to the air conditioner fan and pressure sensor.
- Pull the wire with the activation button through the hole in the hydraulic corrector.
- Place the button in the location you like on the dashboard.
- At the heater switch, connect the orange and gray wires.
- Install the temperature sensor in the hole through which the wiring going to the heater fan passes.
- Install the thermostat by connecting the required wire to it. Choose the installation location yourself as you like best.
Installation phase
Capacitor
The next step is installing the capacitor. To do this you need:
- Replace the sound signal in place of the outside air temperature sensor;
- Install a plastic clip and temporarily place the capacitor;
- Connect the compressor tube and the condenser;
- Complete the fixation of the capacitor.
Tubes
- The receiver is connected to the evaporator using a special tube. The instructions indicate which tube should be used for these purposes;
- Another tube is pulled from the evaporator to the compressor;
- A pressure sensor and corresponding connecting tube are installed.
Compressor
The only thing left is the compressor
- Remove the right boot and dismantle the extension.
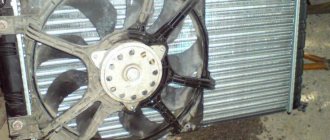
- Remove the generator and generator bracket.
- Disconnect the wiring from the right headlight.
- Install the new bracket that comes with the air conditioner and secure the generator to it.
- Fix all the tubes going to the compressor, and finally make sure that the compressor is securely fastened.
- Install the drive belt.
- Fill the system with 500 grams of freon 134.
Completing the installation
Installation of condenser, tubes and compressor
To install the capacitor, you will need to move the horn to another location. Place the capacitor housing on its bracket. After connecting the compressor tube to the condenser, you can finish fixing the device. Then connect the evaporator and receiver using tubes (follow the instructions). Place the second tube between the evaporator and the compressor. At the last stage, install the pressure sensor.
To install the compressor, you will need to remove the generator and bracket. In the air conditioner kit you will find a new bracket - install it. Then put the generator, compressor and tension roller in place (the same as on the timing mechanism). You tighten the belt and go to refill with freon - it is better not to perform this operation yourself.
Installing an air conditioner on a VAZ 2114
A comfortable ride in a VAZ 2114 is ensured by good roads and the design of the car. And the air conditioner on the VAZ 2114 will never hurt in the summer heat. Of course, you can open the windows, but this will not give the desired coolness in the cabin, and a lot of dust and other troubles will appear.
Buying an air conditioner for a VAZ 2114 is not an ideal purchase for cooling the interior, but this device copes with its responsibilities quite well. The difference in temperature outside and in the car is approximately 12° (it’s cooler inside).
Air conditioning for VAZ 2114 – dream or reality?
It's summer outside, so every driver uses all available methods to ensure the most comfortable operation of the car. Installing an air conditioner in most cases helps solve the problem. Therefore, today we will help you find out how to install an air conditioner on a VAZ 2114.
Although the devices that are sold today can hardly be called ideal, they do their job well and cool the car interior quite well. The air conditioner for the VAZ 2114, of course, cannot boast of having such a wide functionality as standard products from famous world brands, so you should not expect perfection.
If your car is already equipped with air conditioning, it will be useful to know how to refill the air conditioner in a car.
Many potential buyers are interested in the efficiency of a car air conditioner. So, if you turn on the air conditioning “to full”, the air temperature in the cabin can drop by about 5-12 degrees, which in most cases is quite enough. It is necessary to understand that much depends on the number of passengers, air humidity and some other factors.
Air conditioner device
A car air conditioner works using the car's standard engine as a drive. This slightly increases overall fuel consumption, but significantly increases the level of comfort in the car. The air conditioner is supplied with the following components:
- evaporation unit, sensor and relay;
- capacitor;
- compressor;
- discharge pipeline;
- pipeline;
- condenser tube;
- recirculation plug;
- plug axis;
- belt;
- set of bushings, seals, fasteners.
Air is supplied to the cabin through conventional ventilation openings.
Air coolers Planar Cool
The Planar Cool device produced is intended for trucks. Planar Cool cools, humidifies and purifies the air in the driver's and occupied cabins. Cooling occurs due to the evaporation of water, as a result of which the temperature decreases. Electricity is used solely to rotate the fan, which blows air through the evaporator.
| Model | power, kWt | Fan capacity, m3/h |
| Planar-Cool-12V | 0,4 | 205 |
| Planar-Cool-24V | 0,4 | 205 |
Device contents
Any type of air conditioner has approximately the same basic characteristics:
- Compressor drive – car engine
- Air temperature – 9-18°
- Temperature difference – 5-12°
- Productivity – 310 m?/hour
- Power – 2.1 kW
- Type of current - constant
- Voltage – 12 V
- Refrigerant – R134A
- Oil – SP-15
The set comes in a cardboard box. Includes:
- compressor;
- capacitor;
- evaporator block;
- tension roller;
- bracket;
- tube No. 1;
- tube No. 2;
- evaporator tube;
- pipeline;
- wiring harness;
- roller bolt;
- hardware;
- generator bracket;
- technical passport;
- belt;
- installation instructions.
Installing an air conditioner on a car
Installing an air conditioner on a VAZ seems simple, but it is not. If you hire an installer, you need to ask about his license for this type of work and the guarantee for the installation performed. If you have the skills to work with the tool, you can try to install it yourself. As an example, we can take the Frost air conditioner. The kit includes absolutely everything that is required for installation.
- Installation of the evaporator block.
- Laying electrical wires.
- Installation of the capacitor.
- Installation of tubes.
- Secure the set of wires with clamps.
- Install the compressor.
To install the evaporator, do the following:
- remove the rubber hood seal;
- remove part of the plastic drain on the right side;
- completely remove the heater filter along with the housing;
- take from the kit and glue Guerlain;
- install the lower part of the evaporator;
- install the fan housing;
- Install the fully assembled evaporator.
When laying wires you need:
- remove the air filter;
- remove the adsorber;
- remove the lower protection cover of the mounting block;
- remove the headlight hydraulic corrector seal;
- stretch the positive wire along a standard bundle of wires to the battery;
- lay wires suitable for the air conditioner fan and pressure sensor;
- the wires with the power button are pulled through the hole in the hydraulic corrector;
- the button is installed in a suitable location on the instrument panel;
- the gray and orange wires are connected on the heater switch;
- install the temperature sensor in the hole through which the wires going to the stove fan pass;
- install the thermostat by connecting the appropriate wire to it. The installation location is chosen arbitrarily.
To install the capacitor:
- the sound signal is replaced in place of the temperature sensor, which measures the outside air temperature;
- install a plastic clip and temporarily install a capacitor;
- connect the condenser and compressor with a tube;
- finally fix the capacitor.
The remaining tubes are installed:
- the receiver must be connected with an appropriate tube to the evaporator;
- stretch the tube from the evaporator to the compressor;
- install the pressure sensor and connecting tube.
To install the compressor, it is recommended:
- remove the right boot and stretcher;
- remove the generator and its bracket;
- disconnect the wires from the right headlight;
- install the new bracket from the kit and secure the generator;
- attach all the necessary pipes to the compressor and secure it;
- install the drive belt;
- fill with 500 grams of freon.
The further operation of the installation largely depends on how it is configured. The efficiency of the system also depends on the temperature and humidity of the street air, and on the number of passengers in the car.
You can install an air conditioner on a VAZ 2114 with your own hands, as well as with the help of specialists who have certificates for the right to carry out such activities. It should be noted that when this device operates, fuel and oil consumption will increase and the engine will work under greater load.
The comfort of cool air in the cabin is worth the expense, but it is worth considering the need to purchase this not very cheap device.
About refilling the air conditioner
Refueling air conditioners must be done using specialized equipment, where the unit does almost everything for you.
Before refueling, make sure that the technician has permission for this type of activity. Also ask what equipment the freon extraction procedure will be used on (if you are refilling).
The refueling procedure is performed in the following order.
- Removing old freon. In your case, when you have just installed the air conditioner, this step is skipped.
- A vacuum is created inside the system. This is necessary to check the tightness of your equipment. If there are defects, the filled freon will simply leak out and you will waste your money on an expensive refill.
- Additives and special oil are added to the system. Over time and as the air conditioner is used, this oil disappears. So during subsequent refills you will have to fill in both freon and new oil.
- The circuit is filled with freon.
- The system is being tested.
- The service of specialists is paid.
Required freon
In the case of the VAZ 2114, freon refilling is required in a volume of no more than 500 grams. This is the amount of refrigerant that most cooling systems suitable for this car model are designed for.
You won’t be able to refill the air conditioner yourself, if only for the reason that buying equipment and the refrigerant itself for a couple of refills is completely unreasonable. The only exception is if you yourself are engaged in providing auto repair and maintenance services, which is why you have a gas station.
After installation, the air conditioner must be recharged. In addition, this device will have to be refilled at least once every 3 years, since up to 10% of freon can leave the system within a year, even if the circuit has never been depressurized. Freon R-134a is now used everywhere as a refrigerant.
And to pump it into the air conditioner you will need special equipment, for which you will have to go to a spare parts store.
And you need to buy the following there:
- set of couplings and adapters;
- hose kit;
- R-134a freon cylinder;
- pressure gauge
Let us list the main stages of pumping freon into the system.
- There is a plastic cap on the low pressure line in the air conditioner. It is carefully cleaned of dust and opened.
- The fitting located under the cap is connected to the hose on the cylinder using the adapter included in the kit.
- The car engine starts and idles. The crankshaft rotation speed should not exceed 1400 rpm.
- The air conditioner turns on maximum air circulation throughout the cabin.
- The freon cylinder is turned upside down, the tap on the low pressure adapter slowly opens.
- The filling process is constantly monitored using a pressure gauge.
- When cold air begins to flow into the car interior and the hose near the adapter begins to become covered with frost, the refueling procedure ends.
Read more: Replacing the valve cover gasket on a VAZ engine yourself