Hi all! Patience has come to an end and I’m tired of always being in love with old-style fuses. After googling I decided to do the standard operation of replacing the fuse box from the Volga with Euro fuses. 1) good contact 2) large selection of fuses according to amperage 3) +3 extra slots
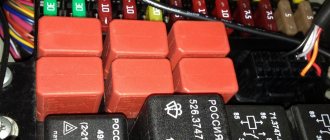
So! What we did after we bought the components: 1) Removed the terminal from the battery, this is the first thing when working with electrics in any car. 2) We removed the old old-style junk. (Be sure to remember the order of connecting the contacts) 3) Next is not a difficult but very important point. Modification of the fuse box. The fact is that in the stock block there are factory jumpers between the fuses. Namely 3-4, 5-6,7-8,9-10. To create such jumpers, we need 4 short pieces of wire (there is no need to cut too much in the cross-section of the wire), 8 “mothers” and heat shrink or plastic chips. Having collected all the components together we get the following
Next, we install jumpers between such boundaries 3-4, 5-6,7-8,9-10. We observe the following
Then we connect everything in the same sequence as on the old unit. We check that everything is neat, everything is insulated, and we check for functionality.
After that, we put the block in its regular place; in terms of fastening, the blocks can be said to be identical; you just need to bend one side of the fastening. It's extremely simple. Note! The Volgov block has a bunch of different fuses of different amperages. I would like to bring the values closer to the stock Zhiguli ones (1-2 16a, and the rest I put 1-2 15a, and the rest 10. Everything works great, and I am very pleased that I have 3 extra slots for connecting additional equipment that I have in prosperity. But more about that later. Thank you all for reading! Until new entries! Subscribe!)
The electrical circuit of the VAZ 2101 is quite simple; anyone can learn to read it. There are no scarce components, but sometimes it happens that a unit refuses to work. For example, one of the headlights (low or high beam) stops working. A very common breakdown on pennies and similar cars. And if it is possible to install a more modern one instead of a standard fuse box, then take advantage of it. Euro fuses are much more effective, contact is not lost, they do not fall out of their sockets, and they do not have to be replaced “temporarily” with a coin. By the way, never try to use a two-ruble coin instead of a fuse, as you expose yourself to great risk - the wiring may melt and catch fire. And any car burns to the ground in a matter of minutes.
Electrical diagram of VAZ 2101: assignment of fuses
There are only ten fuses in the mounting block, they all have different ratings and are responsible for specific circuits:
| Fuse number | Rated current | Circuits for which he is responsible |
| F1 | 16 Amps | Serves to power lampshades, horns, cigarette lighters, brake lights, as well as a socket for switching on an additional lamp. |
| F2 | 8 Amps | Protects the windshield wiper circuits (including the wiper relay), the electric heater motor and the windshield washer pump. |
| F3 | 8 Amps | Responsible for the power supply circuit for the left headlight (high beam lamp), as well as for supplying voltage to the warning lamp in the instrument panel. |
| F4 | 8 Amps | Same as in F3, but only for the right side. |
| F5 | 8 Amps | Low beam circuit, left side. |
| F6 | 8 Amps | Right side low beam circuit. |
| F7 | 8 Amps | Responsible for supplying power to the dimensions control, the lamp in the trunk, dimensions (front left and right rear), license plate lighting and instrument panel (via a rheostat). |
| F8 | 8 Amps | Cigarette lighter illumination lamp, engine compartment lighting, as well as side lights (right front and left rear). |
| F9 | 8 Amps | Responsible for powering the lamps for oil pressure, turns, reverse, glove compartment, gasoline level, brake fluid and handbrake, charging, coolant temperature. |
| F10 | 8 Amps | Supplies power to the voltage regulator and excitation winding (rotor) of the VAZ 2101 generator. |
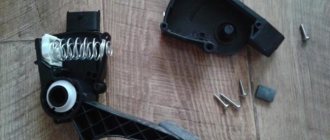
Location of the turn relay VAZ 2107
There are two types of location of turn signals in the classic VAZ family of cars, depending on the modification:
- Engine compartment - an electromagnetic or electronic relay is installed. Applicable to car models of the VAZ 2101-2103 family inclusive.
- Instrument panel - the device is connected using an electronic circuit using semiconductor elements. This arrangement is typical for VAZ cars of the later family.
Let's start disassembling
- Early modification models
To get to the relay, you need to remove the plug by unscrewing the bolt on the dashboard.
We pull the entire panel towards us, move the sensor panel a little to the side so that we can get to the relay.
- The contacts approach the relay from below.
- Disconnect the contacts.
- We remove the old device and install the new one.
- We put the dashboard back, sliding it into the side grooves.
- Screw in the bolt.
We check the turn signals for flickering and characteristic clicks. The frequency of contact closure should be approximately 1 time per second.
The technology is very simple. The main difficulty here is accessibility to the relay. The space under the panel of these models is small, getting there is problematic.
- Later models
- Remove the screws from the steering column switch housing. We remove the casing elements.
- Unscrew the mounting bolt.
- We take out the devices on the electrical wiring inside the cabin.
- We replace the old relay with a new one.
- Screw it back. We put the covers in place.
- Replacing the relay in the engine compartment
- Open the hood. Press the lock of the mounting block cover.
- The part is removed in one simple movement.
- We remove the relay. And we install a new one.
When replacing any of the above relays, special attention should be paid to contact insulation. Insulation is performed using hollow mass braiding. To tie the wires, use a special strip clamp.
Depending on the type of engine power (carburetor or injector), the relay may be located behind the dashboard or in the mounting block located under the hood. The relay design is the same for all modifications of the VAZ 2107, but the replacement procedure differs depending on the installation location.
What is a fuse box for in a car circuit?
Using the VAZ 2101 fuse box, it is possible to achieve the maximum degree of protection against short circuits. The block includes several fusible elements, which, in the event of a short circuit, open one or another circuit. All electrical wiring of the VAZ 2101 is divided into component parts. Therefore, if there is a short circuit, for example, in the cigarette lighter power circuit, the engine will still start and you will be able to get anywhere. All fuses are located in one place - this allows you to inspect the electrical wiring and diagnose it as quickly as possible.
It is also worth paying attention to one feature of the car diagram - all lighting is divided into two halves (left and right). There is a 50/50 chance that both fuses will blow at once, so in most cases your car will have lighting on at least one side. To make repairs, just open the unit cover and, using the table above, find the required element and replace it with a similar one. Please note that you cannot install fuses of a higher or lower rating, since in the first case the electrical wiring of the VAZ 2101 will suffer (the insulation is designed for lower currents), and in the second the fuse element will burn out at the slightest load.
Replacing fuses and block VAZ 2106
YouTube funnels and fuses for the Lada Largus
Replacing the fuse blocks of the VAZ 2106 is carried out if you are armed with a mounting block of blade fuses from the GAZ 3110, which is perfect. Additionally, you need to prepare a wire with a cross-section of about 3.5 square meters. mm, which will serve to create jumpers.
Replacing the VAZ 2106 fuse box with blade ones.
Replacing blade fuses on a VAZ 2106 begins with the following steps:
- the block is unscrewed and pulled down as far as the wires allow;
- jumpers are prepared at home (only 5 of them need to be made);
- replacing VAZ 2106 fuses with knife fuses involves making homemade jumpers according to the diagram;
Video tutorial on replacement
blocks
VAZ
2101-06. my affiliate program!
Recommendation. It is worth keeping in mind that the Volgov version has 13 fuses, the VAZ version has 16, with three spare ones. The new mounting block will not have spare fuses, so number 11 will correspond to number 14 (see the diagram above), numbers 12-15, and so what next. Replacing fuses with blade VAZ 2106 therefore involves working with homemade jumpers.
we make jumpers like this;
Homemade fuse jumpers
- fill the block with jumpers;
- replacing the fuse box with blade VAZ 2106 should ultimately look something like this;
KEY-DOP
Replacing the fuse box for a new VAZ 2106
- we remove the Z-shaped fasteners, because they are no longer useful;
- we turn the old block
towards us and carefully examine it in order to understand which wires go where;
Advice. It’s useful to know that where one connector is located is the input, and where two are located is the output. Moreover, the replacement of the VAZ 2106 safety block should be carried out according to the characteristics of the following principle. Because the new mounting block will mainly use two connectors, the placement of the wires will be very close to each other. Therefore, when throwing jumpers, it is necessary to insulate the branches with heat shrink to avoid short circuits.
- First, we install the input of the first fuse in the new mounting block;
- later we connect the first of the fuses;
- We evenly transfer our client the fuses from the old unit to the new one;
- the end result is a block with 5 jumpers, which go into the connectors in pairs;
- replacing the safety block on a VAZ 2106 is certainly carried out by transferring it from the previous block;
- when the work is completed, you need to secure the block;
- the block has mounting lugs on the right and left, which are perfect on the VAZ 2106 (you just need to bend one of the lugs slightly to the side);
- the new mounting block is fixed with standard nuts;
- You can change the fuse box of a VAZ 2106 by bending it down, as it is also called up, as you like, it’s not easy.
KEY-DOP
Recommendation. It should be noted that it is no longer possible to change the fuse box on a VAZ 2106 by setting fusible ratings. The standard GAZ 3110 has fuses with a current strength of 5 to 25 A. For the VAZ 2106, such ratings are not suitable, because eight-amp and sixteen-amp fuses are included here. But there are no fuses of that rating, and therefore they are installed instead of eight-amp fuses - 7.5 A, coffee-colored, and instead of 16-amp fuses - 15 A blue. This is an aspect that should be taken into account.
If you compare it with the diagram above, the new version will look like this:
- numbers 1, 11 and 12 – 15 A;
- numbers from 2 to 10 and 13 – 7.5 A.
Installing Euro fuses on a VAZ 2101
The price of a new VAZ 2101 fuse box will be about 400 rubles, which is not very expensive. Believe me, installing a new unit will solve a lot of problems associated with the electrical wiring of the penny. The procedure for replacing the old mounting block with a new one:
- Disconnect the battery.
- Make jumpers from female connectors, pieces of wire no more than 1.5 square meters. mm. and heat shrinkage.
- Install the prepared jumpers on the new mounting block. Connect the third and fourth, fifth and sixth, seventh and eighth, ninth and tenth.
- Unscrew both nuts that secure the block to the bracket.
- Without disconnecting the wires, remove the old unit.
- One at a time, connect the wires from the old to the new mounting block.
- After connecting all the wires, carry out a visual inspection and can be tested by applying power.
In order not to check the functionality of all the mechanisms that are included in the electrical circuit of the VAZ 2101, use a 12 V light bulb or a voltmeter.
Using one of these tools, check for voltage at the output of each fuse. After this, install the plastic housing and screw it to the bracket with nuts. Close the lid and enjoy using it. Believe me, now you will look there very rarely.
The electrical system of any car is equipped with special protective elements - fuses. By means of fuse-links, the electrical wiring along the circuit of a particular consumer is protected from malfunctions and its spontaneous combustion is prevented. VAZ 2101 owners should be able to identify possible problems with the fuse box and fix them with their own hands, especially since this does not require special tools and skills.
Electrical diagram of a VAZ-2101, VAZ-2102 car
1 – headlights; 2 – sidelights; 3 – side direction indicators; 4 – battery; 5 – battery charge warning lamp relay; 6 – generator; 7 – starter; 8 – engine compartment lamp; 9 – spark plugs; 10 – oil pressure warning lamp sensor; 11 – coolant temperature indicator sensor; 12 – sound signals; 13 – ignition distributor; 14 – windshield wiper motor; 15 – brake fluid level warning lamp sensor; 16 – ignition coil; 17 – voltage regulator; 18 – windshield wiper switch located in the windshield washer pump; 19 – heater electric motor; 20 – glove box lighting lamp; 21 – additional resistor of the heater electric motor; 22 – plug socket for a portable lamp; 23 – parking brake warning lamp switch; 24 – brake signal switch; 25 – relay-interrupter of direction indicators; 26 – reverse light switch; 27 – fuse block; 28 – relay-breaker for the parking brake warning lamp; 29 – windshield wiper relay; 30 – heater electric motor switch; 31 – cigarette lighter; 32 – lamp switches located in the rear door pillars; 33 – lamp switches located in the front door pillars; 34 – lampshades; 35 – ignition switch; 36 – instrument cluster; 37 – coolant temperature indicator; 38 – control lamp for high beam headlights; 39 – indicator lamp for external lighting; 40 – turn signal indicator lamp; 41 – battery charge indicator lamp; 42 – oil pressure warning lamp; 43 – control lamp for parking brake and brake fluid level; 44 – fuel level indicator; 45 – fuel reserve warning lamp; 46 – instrument cluster lighting lamp; 47 – horn switch; 48 – headlight switch; 49 – direction indicator switch; 50 – external lighting switch; 51 – instrument lighting switch; 52 – wiper switch; 53 – sensor for level indicator and fuel reserve; 54 – trunk lighting lamp; 55 – rear lights; 56 – license plate light; 57 – reversing lamp; 58 – plug blocks of the rear bundle of wires of the VAZ-2102 car; 59 – lampshade for illuminating the rear part of the VAZ-2102 car
VAZ 2101 fuses
One of the important elements of the electrical equipment of the VAZ “kopek” is fuses. Based on the name, it becomes clear that these parts protect electrical circuits and electrical appliances from high loads, absorbing high current and preventing burnout of automotive electrical wiring. The VAZ 2101 is equipped with ceramic fuses, which are structurally equipped with a light alloy jumper designed for a certain current. When the current passing through the circuit exceeds the fuse rating, the jumper burns out and simultaneously opens the electrical wiring branch. In addition to the protective function, fuse links are a unique element for monitoring vehicle consumer faults.
Installation of blade fuses in VAZ 2101, 2103, 2106
The previous post was about the disadvantages of standard fuse blocks, in this same post we’ll talk about installing blade fuses on the VAZ 2101, 2106. The difference in installation on the “kopek” and on the “six” is not too big, the whole difference is in the presence of an additional fuse block in the sixth models that contain backup fuses and fuses for the turn signal and hazard warning circuits, as well as the cooling fan circuit.
Knife fuses have a number of useful properties that are actually better than standard ones, but all the advantages come down to one thing - better contact of the fuse with the socket in which it is installed. That's all. But thanks to this, there are no fuse melting, heating and other joys.
What is needed for installation:
- Key to "8"
- A screwdriver if it is difficult to remove the terminals from the standard unit
- Heat shrink is like a more “touchable” version of electrical tape, although you can also use electrical tape, but it won’t look very good
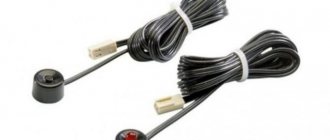
- Tester, may be needed
- Female connectors are 6.6 mm, for VAZ 2106 you will need 12 pcs, for VAZ 2101, 2103 - 8 pcs
- Actually, the blade fuse block itself is suitable for a Volga 3110 with 13 fuses
- Wires for making jumpers
- Straight arms, attentiveness
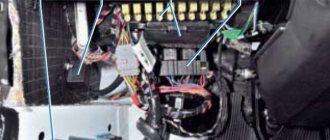
To begin the installation, I recommend starting by disconnecting the battery mass; this is a prerequisite for starting work and guarantees the safety of the work for you and your car. Next, using the “8” key, unscrew the fasteners of the fuse box, making sure that the wires do not come loose from the terminals.
We unscrew it here (VAZ 2106), in the VAZ 2101 there is no lower block, but everything is the same
After you have unscrewed the block, you need to move it down as far as the wires allow. No need to pull all the wires in a row! There is a possibility of mixing something up, and subsequent problems cannot be avoided. The entire installation is carried out according to the following diagram, which shows the markings for connecting the wires.
Wiring diagram for blade fuses in VAZ 2106
This diagram clearly shows in which places to install jumpers; they allow you to reduce the number of wires and simplify the electrical circuit.
Important!!! Jumpers need to be installed on those wires that carry voltage from the engine compartment, that is, from the voltage source wire, installed before the fuse. If you connect a jumper after the fuse, it turns out that current flows through one fuse, which powers two consumers
Next you need to start making the jumpers, their length is about 10cm, it can vary, it all depends on how you want to make them.
They look like this:
Jumpers
Next, you need to connect the contacts of such fuse numbers with these jumpers, for the VAZ 2106 the connection order is:
Thanks for subscribing!
3-4, 5-6, 7-8, 9-10, 11-12, 12-13
For VAZ 2103, VAZ 2101 and all others without an additional fuse box:
Let me remind you that it is necessary to connect the incoming wires on which there is circuit voltage; the current from them goes through the fuse to the on-board network.
Well, then it’s a matter of technique, we remove one wire at a time (starting from 1 fuse) from the old block and rearrange it to the new one, and so on until the last block. After installing all the wires, you need to check the correct connection; this is quite easy to do. For example, turn on the low beam and pull out fuse No. 5, accordingly the left headlight should go out, put the fuse in place, pull out fuse No. 6, the right headlight should go out. If this happens, then these circuits are connected correctly. By analogy, it is necessary to test the remaining circuits.
If, when you remove one fuse, two headlights still light up (for example, or the equipment is working), then the jumper is not installed correctly, check the connection diagram.
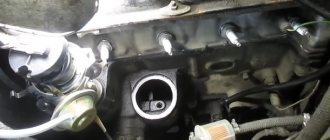
Fuse box faults and repairs
The electrical equipment of the VAZ 2101 is protected by a fuse box of ten elements installed under the dashboard on the left side of the steering column. On the model under consideration, there is no protection of the battery charging circuit, ignition and start of the power unit by fuse links.
How to identify a blown fuse
If one of the electrical appliances on your “penny” has stopped functioning, for example, the stove motor, headlights, wipers, then first of all you need to check the condition of the fuses. This can be done quite simply by inspecting the parts for burnout. The fusible link of the released element will be burnt out (broken). If you have a new modification of the fuse box, then you can also determine the serviceability of the fuse link by visual inspection.
In addition, you can use a multimeter by selecting the resistance measurement limit. The device will allow you to accurately determine the serviceability of the protective element. A failed fuse will have an infinitely large resistance, while a working fuse will have zero resistance. When replacing a fuse link or when carrying out repair work on the unit in question, it would be useful to check the fuses for compliance with the rating according to the table.
Table: which fuse is responsible for what
| Fuse No. (value) | Protected Circuits |
| 1 (16A) | Horn Interior lighting Power socket Cigarette lighter Brake light - tail lights |
| 2 (8A) | Front windshield wipers with relay Heater - electric motor Windshield washer |
| 3 (8A) | Main beam of the left headlight, indicator lamp for turning on the main beam of headlights |
| 4 (8 A) | High beam right headlight |
| 5 (8A) | Low beam left headlight |
| 6 (8A) | Low beam right headlight |
| 7 (8A) | Side lights - left sidelight, right taillight, warning light Trunk light License plate light Instrument cluster light |
| 8 (8A) | Side lights - right sidelight and left taillight Engine compartment lamp Cigarette lighter lighting |
| 9 (8A) | Coolant temperature gauge Fuel level gauge with reserve warning light Indicator light: oil pressure, parking brake and brake fluid level engaged, battery charge Turn indicators and related warning lights Reversing light Glove compartment lighting |
| 10 (8A) | Voltage regulator Generator - field winding |
Why does the fuse link burn out?
The VAZ 2101 is equipped with less powerful electrical equipment. However, during operation of a vehicle with electrical equipment, various malfunctions may occur. Quite often, breakdowns occur in one circuit or another, sometimes accompanied by a short circuit. In addition, there are other reasons for damage to fuse links:
- a sharp increase in current in the circuit;
- failure of one of the electrical appliances in the car;
- improper repair;
- manufacturing defects.
Electrical diagram of a VAZ-21011, VAZ-21013 car
1 – headlights; 2 – front direction indicators; 3 – side direction indicators; 4 – battery; 5 – battery charge warning lamp relay; 6 – relay for turning on low beam headlights; 7 – relay for turning on the high beam headlights; 8 – generator; 9 – starter; 10 – engine compartment lamp; 11 – spark plugs; 12 – oil pressure warning lamp sensor; 13 – coolant temperature indicator sensor; 14 – sound signals; 15 – ignition distributor; 16 – windshield wiper gear motor; 17 – brake fluid level warning lamp sensor; 18 – ignition coil; 19 – electric motor for windshield washer; 20 – voltage regulator; 21 – heater electric motor; 22 – glove box lighting lamp; 23 – additional resistor of the heater electric motor; 24 – plug socket for a portable lamp; 25 – parking brake warning lamp switch; 26 – brake signal switch; 27 – relay-interrupter of direction indicators; 28 – reverse light switch; 29 – fuse block; 30 – relay-interrupter for the parking brake warning lamp; 31 – windshield wiper relay; 32 – heater motor switch; 33 – cigarette lighter; 34 – lamp switches located in the rear door pillars; 35 – lamp switches located in the front door pillars; 36 – lampshades; 37 – ignition switch; 38 – instrument cluster; 39 – coolant temperature indicator; 40 – control lamp for high beam headlights; 41 – indicator lamp for external lighting; 42 – turn signal indicator lamp; 43 – battery charge indicator lamp; 44 – oil pressure warning lamp; 45 – control lamp for parking brake and brake fluid level; 46 – fuel level indicator; 47 – fuel reserve warning lamp; 48 – instrument cluster lighting lamp; 49 – headlight switch; 50 – direction indicator switch; 51 – sound signal switch; 52 – windshield washer switch; 53 – wiper switch; 54 – external lighting switch; 55 – instrument lighting switch; 56 – sensor for level indicator and fuel reserve; 57 – trunk lighting lamp; 58 – rear lights; 59 – license plate light; 60 – reversing light
VAZ 2106 fuse box pinout, diagram
If you have any problems with electrical equipment: the low or high beams have disappeared or are not working, the turn signals, stove, cigarette lighter, fan, wipers are not working, the signal has disappeared, etc., then this could all be the reason that the fuse has blown. This means it needs to be replaced.
To do this, you need to know the location of the mounting block. And it is located under the steering wheel, on the left side. In order to understand what the VAZ 2106 fuses are responsible for, you need to look at the simple pinout of the old fuse block (FB) and see the description below.
Table “VAZ 2106 fuse designations”