How to repair the lock on the rear and front doors of a Niva Chevrolet
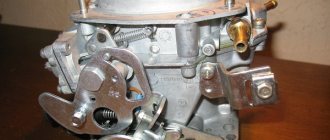
The Niva Chevrolet door lock is a silent device. The internal parts are located in the same way as in standard locking mechanisms, but the strength and durability of the product is given by the plastic case that covers the internal elements.
Principle of operation
The door lock device on the Chevrolet Niva is equipped with pins around the perimeter. The back and front teeth close the door when they come together and open when they diverge. If the right or left pin jams or breaks, the mechanism will lock. Without falling into the grooves, the internal fragments cannot complete their path, so a disconnective displacement occurs. The malfunction is caused by prolonged use and wear. The situation is aggravated by moisture ingress, burglary, and metal corrosion.
The first signs of a breakdown are a squeaking sound when turning the key. Only disassembly and inspection of the mechanism will reveal the cause of the malfunction. After diagnostics, it will be determined what exactly is required: repair or replacement. Sometimes it is enough to carry out lubrication work or replace the core of the part. In other situations, it is necessary to install the entire device. The average price of a Euro-lock is from 1,500 rubles, depending on the place of purchase.
Adjustment
To carry out preventive maintenance on a Chevrolet, the passenger door lock is adjusted and lubricated with silicone. To work, you will need a hexagon and lubricant. The adjustment is carried out in the open position. The stand is disassembled by unscrewing the bolts. It is important to fix them at a right angle. The screws must not be removed. When the fastener is loosened, the position of the lock is easily adjusted.
By placing the mechanism in one position, the functionality of the device is checked. If the cause of incorrect operation has not gone away, a shift in the other direction is carried out.
How to remove the lock
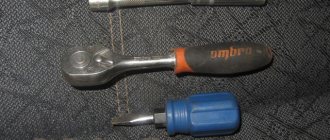
To remove the Euro lock on a Chevrolet Niva, you will need a set of equipment. You will need to prepare:
- screwdrivers;
- pliers;
- socket wrench 8;
- knife.
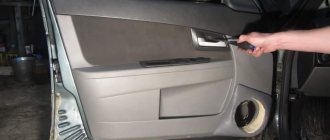
Disassembly of the lock can be partial or complete. Only professionals can carry out a competent overhaul, and any layman can perform removal/replacement. The process is performed from the inside of the door. Algorithm of actions:
- Pull out the plugs.
- Unscrew the three bolts.
- Remove the trim.
- Pry off the facing panel.
- Remove the front shutter glass position switch.
- Remove the wiring harness block.
- Disconnect electrical wiring: speakers, power windows.
- Pull out the skin card.
- Remove external fastenings.
- Remove the lock.
Castle repair
After removing the device, you can disassemble the Euro-lock to eliminate its malfunction. When the protective plastic fasteners are unscrewed, you will be able to gain access to the rod. It can be removed with an impact screwdriver and a wrench. The rod is connected to a latch and a switch. Further instructions:
- After disconnection, the pin is removed from the end of the rods.
- The return spring and lock washer are removed.
- The core is removed.
After a careful visual inspection, the cause of the failure is determined. The spring is being replaced, lubricated, parts are cleaned of dirt, pins are adjusted, and corrosion is removed.
After repair, assembly is performed in reverse order.
Replacing the larva
The rods are attached to hinges. If these elements fail, then purchasing them and installing them without the help of specialists will be quite problematic. In case of high wear of parts, the optimal solution is to replace the core. After removing the larva, the sequence of actions is as follows:
- The internal cavity is treated with an anti-corrosion substance.
- The new larva is lubricated with a special product.
- The core is being installed.
- The spring and washer are returned to their place.
- The traction is being connected.
- Electrical wires are connected. The nuts are screwed on.
- The operation of the lock is checked.
- The element is inserted into the handle. Fixed with fasteners.
- The casing is put in place, the pistons are snapped into place.
- Screws are used to connect the handle with the escutcheon.
- The screws are closed with plugs.
Refinement of the base and mechanisms
If after installation the mechanism does not work correctly, then it is further processed and adjusted. If difficulty is felt when entering the key, then:
- Additional lubrication of the elements or adjustment of the internal teeth will be required.
- Spacers are installed between the cylinder and the lock body.
- The spring is tightened.
- The front part of the Euro-lock is cleaned or polished.
- The quality of tightening of fasteners is checked.
How not to slam a door loudly on a Niva
Sanek 18 Feb 2009, 00:27
Vitya wrote: Please note that I do not think that remodeling and finishing UAZs is not good! Vice versa! I respect those who took the UAZ as a basis and designed it for specific purposes - “dear to his heart”! ))))
The doors of VAZ 2104, 2105, 2106, 2107, NIVA do not close well. Part 1
Cleaning and lubrication, maintenance and adjustment of door
on cars VAZ 2104, 2105, 2106, 2107,
NIVA
...
Adjusting door locks.
a little about adjusting door locks, how I adjust door locks. Vkontakte community …
The back door of Niva Chevrolet does not open
Initially, a Chevrolet Niva is equipped with a central lock that can remotely control opening. For this purpose, each of the 5 doors has a special device - an actuator. It is responsible for removing the lock when receiving a signal from the alarm system.
But in practice, most problems with opening the rear door are not at all related to the operation of electronic components.
In 95% of cases the problem is related to mechanical parts. This can be either the lock itself or the rods located inside. In some cases, this may be due to the fact that the Chevrolet Niva door seal freezes on a recently washed car. But in this case it is easy to determine the source of the problem, so further we will consider situations in which the problem mainly arises with the operation of the lock.
Broken rod
Basically, the rod can bend if it was assembled incorrectly. The problem can also appear if the car is often used in off-road conditions and dirt gets into the cavity. This can happen if the plastic film peels off from the door frame. In this case, dust may accumulate inside it.
During movement, dust settles not only at the bottom of the cavity, but also on all components, including the levers. After the car gets caught in the rain or washed, all the dust turns into dirt, firmly settling on the insides. As it accumulates, it leads to a decrease in the lock stroke, and at the moment when the passenger tries to open the door, great efforts have to be made. Because of this, the rod begins to bend over time. And at some point its progress is not enough to unlock it. Even after it is straightened, the integrity of the system will already be compromised and components will need to be replaced.
In this situation, complete replacement of the door lock components, or dismantling, lubricating all components and cleaning the lock can help. This must be done as early as possible, even if the slightest problem arises, so that the Niva Chevrolet door handle does not become completely blocked.
The rear door device is quite simple and does not contain complex mechanisms. The lock used is the same as on most AvtoVAZ models. The only difference is that its locking and unlocking is actuated by an actuator. Sometimes they fail and then it becomes necessary to open them manually.
In this case, it is necessary to know the nuances of this system. If you activate the system at the moment when one of the doors is open for at least one click, this can lead to the other one jamming.
Spring failure
Basically, the problem of lock failure lies in the fact that the tendrils of the spring break off, which loads the rear door lock lever. This occurs due to the use of low-quality steel in the production of the part or violations of operating conditions.
In any case, such a breakdown leads to the fact that one of the lock levers begins to move in a random direction and it is impossible to predict whether the lock will open at the moment or not. There are even situations when the rear door lock of a Niva Chevrolet can open while driving.
Tailgate Niva Chevrolet
• Niva • Chevrolet • Body
Removing the spare wheel bracket for Niva Chevrolet
To remove the bracket, you will need a 17mm wrench. Remove the spare wheel from the bracket and Unscrew the four nuts securing the bracket to the tailgate and remove the washers installed under the nuts
Remove the bracket and rubber washers from the tailgate studs. Installation of the Chevy Niva spare wheel bracket is performed in the reverse order of removal.
Removing and installing the tailgate trim of the Niva Chevrolet
To replace the trunk lid trim of a Chevy Niva, you will need flat-blade and Phillips-blade screwdrivers. Open the rear trunk lid
Remove the top screws securing the glass frame
Remove the decorative caps on both sides of the frame and remove the screws located under the caps.
Remove the trunk lid glass frame
Unscrew the filler plug and remove the neck trim of the tailgate glass washer reservoir
Carefully pry up the upholstery with a screwdriver at the locations of the fastening rivets and remove it. Installation of the trim and glass frame of the Niva Chevrolet trunk lid is performed in the reverse order of removal. Replace broken upholstery fastening pistons with new ones.
Removing and installing the trunk lid door lock drive Niva Chevrolet
To replace the Chevy Niva trunk lid lock, you will need flat-blade and Phillips-blade screwdrivers. Remove the upholstery
tailgate
and disconnect the wire from the negative terminal of the battery.
Remove the screws and remove the lock drive activator. Disconnect the wiring harness block from the activator. Installation of the rear door lock drive activator on a Chevrolet Niva is performed in the reverse order of removal.
Removing and installing the lock and handle of the trunk door lock of the Niva Chevrolet
To replace the lock or handle of the trunk lid door of a Chevy Niva, you will need keys 8 and 10, flat-blade and Phillips-blade screwdrivers. Remove the tailgate trim and disconnect the wire from the negative terminal of the battery
Remove the screws securing the trunk lid lock
Using a screwdriver, disconnect the rods from the door lock switch lever and from the door handle
Disconnect the black and white blocks of the wiring harnesses from the Chevrolet Niva trunk door lock activator and remove the lock assembly with the drive activator
Unscrew the door handle fastening nuts and remove the handle bracket bolt
In the "open" position, slide the handle to the left and remove the handle from the door opening. Installation of the Chevy Niva rear cover door lock and its handle is performed in the reverse order of removal.
How to remove the trunk lid of a Niva Chevrolet
To remove or install the Chevy Niva trunk lid, you will need keys 10, 13, 17 and a screwdriver. Disconnect the wire from the negative terminal of the battery
Unscrew the screws and remove the rivets securing the left trunk trim
Move the upholstery to the side and remove the screws securing the side panel trim
Remove the decorative trim for the seat belt eye and remove the bolt securing the eye to the body.
Remove the Niva Chevrolet seat belt from under the side panel trim and remove the trim
Disconnect the wiring harness connector from the trunk light and disconnect the tailgate wiring harness connector.
Remove the exhaust ventilation deflector and unscrew the nut securing the earth wire terminal
Remove the rubber bushing from the body hole and remove the trunk door wiring harness from the body hole.
Remove the bolts securing the door opening limiter
Remove the bolts securing the lower and upper hinges of the tailgate, having previously marked the position of the hinges on the body (if you are installing the previous door)
Remove the trunk lid. Installing the firecracker on a Niva Chevrolet is carried out in the reverse order of removal; after installation, be sure to adjust the position of the door in the body openings and the trunk lid lock.
Adjusting the position of the Chevrolet Niva tailgate
The position of the tailgate is adjusted by changing the position of the lock latch and the door tenon socket. You will need an impact screwdriver to make adjustments.
Using an impact screwdriver, loosen the screws securing the door lock retainer and the tailgate tenon socket. Move the retainer and socket in the desired direction and tighten the screws. This completes the adjustment of the trunk lid lock.
Adjusting the front door lock (Chevrolet Niva Exterior (external elements)) - AutoCall
Raise the hood and secure it in the open position with the stop. Disconnect the rods of the inner and outer handles, see.
Re: About adjusting the tailgate > Please explain if anyone has either experience or knowledge...
Reassemble the tailgate in the reverse order of disassembly.
Removing the tailgate mechanisms: Unscrew the two 5 cm screws.
Removing the front door trim: Front door locking mechanism: Removing the front door handles: Disconnect the connectors for the outside mirror gear motor wiring harness and the front door wiring.
Unscrew the three screws and remove the outside mirror. Remove the outer lower and upper sliding window seals.
Unscrew the screw and remove the sliding glass guide assembly with the seal. Through the openings in the inner door panel, unscrew the two screws securing the sliding window frame to the window lifter and remove the glass from the door cavity.
Disconnect block 10 fig. Unscrew the four nuts 5 securing the window regulator and remove it complete with the gear motor through the opening in the inner door panel. Unscrew the two 6 cm screws. Disconnect the rods 5 and 7 of the outer handle from the lock 9. Unscrew the nut and bolt and remove the 4 cm handle.
Unscrew the three screws and remove the 9 cm lock. Unscrew the three bolts securing the door opener and remove it. Remove the wiring harness from the door cavity.
Removing the rear door trim: Before adjusting the lock, it is recommended to outline the contours of the lock on the body pillar. If the door closes too tightly, loosen the bolts that secure the lock, move it outward, and tighten the bolts. If the door does not close tightly, move the latch inward. In this case, there should be no retraction or protrusion of the door relative to the body.
If the door lifts when closing, sagging in the open position, lower the latch.
If the door is not properly unlocked using the inside handle, adjust the position of the internal drive rod. To do this, disconnect the 7 cm bracket. After completing the adjustment, tighten the fastening screws. Open the rear door and lower the sliding window to the bottom position.
Niva Chevrolet rear door lock
Squeeze the tabs of the latch and remove button 3 fig. Unscrew the screw, take out niche 2 fig. Unscrew the two 5 cm screws.
Using a flat-head screwdriver, remove the trim and remove the window handle. Use a screwdriver to press out buttons 1 and remove trim 6 of the rear door. Removing the rear door window regulator is carried out in the same way as removing the front door window regulator.
Unscrew two screws 8 fig. Disconnect the rod 8 of the outer handle from the lock 11.
REPLACING THE DOOR ACTIVator FOR A Chevrolet NIVA
Removing the rear door handles: Rear door locking mechanism: Unscrew the screw securing the drive 1 cm. Unscrew the three screws and remove the lock 11 assembled with the lock release drive and rods 4, 6 and 7. Unscrew the three bolts securing the limiter and remove it. Unscrew the bolt securing the limiter to the body and Clean and inspect the parts, lubricate with CV joint-4 grease or similar. Install the limiter in the reverse order of removal. Remove the bolts of the sliding glass mounting plate.
Unscrew the bolt securing the guide and remove the internal glass seal. Remove the glass by moving it in the opening as shown in the photo.
Checking and repairing doors and hoodIf the door panel is deformed, it is necessary to straighten or replace the door, which requires its removal and disassembly. When removing the door, open it all the way and disconnect the door opening limiter by knocking out the fastening pin to the A-pillar. Hold the door in the open position, use an impact screwdriver to remove the screws securing the door hinges to the post and remove the door.
Install the door in the reverse order. Before final tightening of the fastening screws, adjust the gaps between the door and the body, which should be uniform around the perimeter. To make it easier to orient the initial position of the door, before starting the adjustment, outline the contours of the hinges on the body pillar.
When disassembling the door, unscrew the screws securing the armrest, having first removed the decorative plastic plug of the upper screw, and remove the armrest. Press out the socket 20 (see Fig. 190), remove the locking spring 1 using fixture 2 A.78034 and remove the window lift handle 22. Using a screwdriver, pry off the lining of the inner handle of the lock drive and remove the lining. Overcoming the resistance of the spring plastic holders, remove the door trim (the holders fit into the holes in the inner door panel: four pieces along the lower edge of the trim and two each along the right and left edges).
With the sliding glass in the upper position, unscrew the fastening screws and remove the front and rear guide grooves of the sliding glass. Lower the glass down, loosen the nut of the tension roller 12 of the window lifter, disconnect the cable 4 from the sliding window frame, remove the cable from the rollers and remove the glass through the lower door opening. Unscrew the fastening nuts and remove the window lift mechanism.
Remove the sliding glass seals and the rotating glass assembly by unscrewing the fastening screws. Unscrew button 6 (see Fig. 189) for locking the lock, unscrew the screws securing bracket 4 of the internal handle 1 of the lock drive, unscrew the screws securing the lock body and remove the lock with rods, having previously disconnected rod 20 from the lock switch arm. After unscrewing the fastening nuts, remove the outer door handle. After unscrewing the two fastening bolts, remove the door opening limiter.
The front door is assembled in the reverse order of disassembly. When installing the window regulator, check that the cable is laid correctly on the drum: the turns of the cable should not overlap each other. After installing the window regulator mechanism and the cable on the rollers, adjust the cable tension with the tension roller so that the window regulator operates smoothly and without jamming.
Before installing the door trim, check the fastening of the plastic spring holders on the trim and their condition.
For normal operation of the door lock, adjust the position of the lock lock body by first outlining the contours of the lock on the rack and loosening its fastening bolts. If the door closes too tightly, move the lock outward and tighten the bolts. If the door closes poorly, the latch is moved inward. If the door lowers when closing, move the latch up, and if it rises (the door sags in the open position), move the latch down.
If the door is not unlocked properly, use the inside handle to adjust the position of the handle. To do this, loosen the screws securing the handle bracket and move the handle together with the bracket in the desired direction. Once the adjustment is complete, tighten the fastening screws.
Tailgate. To replace faulty components and mechanisms and straighten deformed panels, remove the tailgate by disconnecting the stops from the door, unscrewing the nuts securing the door to the hinges and removing it.
When installing the door, adjust its position in the body opening due to the oval holes of the hinges for the fastening studs, so that the gaps around the perimeter between the door and the body are uniform. After completing the adjustment, tighten the fastening nuts.
If the gas-filled stops do not hold the door open, replace them with new ones. The stops cannot be disassembled. If the door lock is difficult to lock, adjust the position of the lock by moving the body or latch to the required position. Adjustment is allowed due to enlarged holes in the body and lock retainer. Before adjustment, it is recommended to outline the contours of the lock body and latch for orientation.
Hood. If the hood panel is deformed, it is straightened or replaced with a new one. To remove the hood, uncotter the stop axis and disconnect it from the hood. Holding the hood, unscrew the bolts securing the upper hinge links and remove the hood.
Install the hood in the reverse order. During installation, it is necessary to adjust the position of the hood in the body opening. The hood in the opening should be located with equal gaps around the perimeter. When adjusting, outline the contours of the hinges and loosen their fastenings. Due to the enlarged holes, the hood is moved to the desired position and the hood fastening is tightened.
Rice. 199. Hood lock: 1 - lock body; 2 - spring; 3 — ejector; 4 - hook; 5 — drive rod; 6 — drive handle
If the hood lock (Fig. 199) does not close or closes with difficulty, adjust its position. To do this, with the hood open, outline the contours of the lock body 1, loosen the nuts securing it and, due to the enlarged holes, move the lock body in the desired direction. Tighten the fastening nuts and check the operation of the lock.
Read about the structure and design of the VAZ 2121 Niva car...