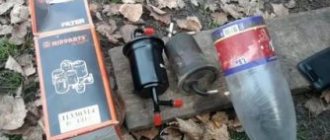
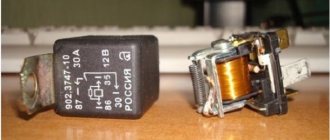
How to change a fuel filter - buying a new element
When choosing this element, be sure to pay attention to the following parameters:
- filtration level. If it is insufficient and large particles nevertheless penetrate into the system along with the fuel, this will very quickly lead to engine failure;
- the area of the filtration element, as well as the presence of a rubber seal that covers the entrance to the filter itself. If there is none, this part will be very problematic to replace.
Depending on the fuel system, fine filters are divided into:
carburetor, permissible degree of purification is 15-20 microns (smaller particles will pass into this system, but will not harm the fuel delivery system to the engine);
injection, finer degree of purification, 5-10 microns (in such systems, the requirements for the maximum size of permissible contamination are higher, i.e.
the injector can become clogged with larger particles, so the holes in the filter are smaller);
diesel engines are capable of retaining not only very small solid particles (less than 5 microns), but also removing moisture, and this is very important for a diesel engine. When purchasing, it is important to indicate to the seller the make and year of manufacture of your car in order to choose the right filter
For the most part, if there is no product specifically for your case, then you can choose something interchangeable. But there are cases where this is not possible, so check your vehicle's manual for this information.
When purchasing, it is important to tell the seller the make and year of your car in order to choose the right filter. For the most part, if there is no product specifically for your case, then you can choose something interchangeable
But there are cases where this is not possible, so check your vehicle's manual for this information.
How to replace the fuel filter on a VAZ 2109?
Fuel cleaning elements are necessary to ensure that the power unit is supplied with fuel that has been purified from various impurities and dirt present in the tank. The VAZ 2109 fuel filter (installed injector or carburetor) retains all these elements, resulting in a high-quality combustible mixture.
If the filter is clogged or of poor quality, the resins have a destructive effect on all engine systems, clogging pipelines and injectors. The presence of water in fuel contributes to the appearance of rust and damage to system elements, which will inevitably lead to breakdowns in the cylinder-piston group.
It will be useful: A method for eliminating a breakdown of the air recirculation drive, all about tightening the cylinder head bolts
Dirt located in the channels along with water in the fuel, when frozen at low temperatures, can cause difficulty starting the engine.
The condition of the fuel purifier largely depends on the external factors in which the car is operated, but to a greater extent on the quality of the fuel.
Contaminated purifier
Experts advise replacing the fuel filter more often than indicated in the documentation. This is due to the fact that the quality of gasoline or diesel fuel at our gas stations is often quite low. Domestic fuel does not have ideal purification or ideal conditions for transportation and storage. As a consequence, an increase in the load on the engine and a decrease in its power, as well as a decrease in the resource of the fuel system.
Replacing a fuel filter, no matter whether an injector or a carburetor is installed, is quite simple, and the filter itself is inexpensive, so do not forget to replace it on time. We will tell you in this article how to save money by installing it yourself.
Safety
Regardless of the type of engine on your VAZ 2109, the procedure for replacing the fuel cleaning device must be carried out in compliance with certain safety measures.
- Do not smoke under any circumstances while repairing the fuel system. Be patient. We do not recommend going outside to smoke. Your clothes may be oily or saturated with fuel. The slightest ember and problems cannot be avoided.
- Always keep a fire extinguisher near your car. When changing the fuel cleaner, place it next to you. A useful measure that has saved more than one person and saved more than one car.
- Avoid contact of fuel with eyes. It is best to work with safety glasses.
- Work on the fuel system only in well-ventilated areas. If repairs are being carried out in winter, it is better to dress warmly and open the garage doors.
- Do not change the filter outside during extreme heat. Even high air temperatures and direct rays of the sun can become a source of fire.
- You can work on the fuel system only when the engine has completely cooled down.
A fire extinguisher is a must have at hand.
According to the operating manual, on injection VAZ 2109 the fuel purifier should be changed once every 20 thousand kilometers. In fact, given the operating conditions, this period should be halved. As for the carburetor, it is recommended to change the filter every 10 thousand kilometers. In practice - about 7 thousand kilometers.
Replacing this device is a fairly simple task that even a beginner can handle. The most important point is compliance with safety measures.
Loading …
Replacing the fuel filter
According to the schedule of routine maintenance as part of the maintenance of VAZ 21099,2109 vehicles, the fuel filter must be replaced after 20 thousand mileage, but as mentioned above, it is advisable to carry out the replacement at 15 thousand or even earlier, taking into account the influence of external factors. Below we present the procedure for replacing the fuel filter on VAZ 21099,2109 models with an injector.
To replace the filter you need to use a pit or lift. Work must be performed in a well-ventilated room or outdoors; it is not recommended to work in the heat; the entire process is carried out away from open flame sources.
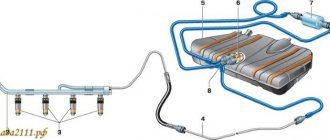
The fuel filter is located under the vehicle behind the fuel tank near the exhaust pipe. To remove it you need to loosen the bolts holding the bracket together.
Next, unscrew the two fittings of the inlet and outlet pipes. In order to unscrew the nuts, you need two 19mm wrenches with which we unscrew the nut located on the filter housing that secures the pipeline.
Replacing the fuel filter VAZ 2109
It is imperative to fix how the fuel direction indicator is located, and you also need to take into account the possibility of fuel leaking from the pipes.
When reinstalling, pay attention to the direction indicator, since fuel will not flow through the pipeline into the injector through an incorrectly installed filter. Check the presence and integrity of the sealing rings, without which installation is prohibited, as this will lead to leaks and may cause an emergency. After installing the filter, start the VAZ engine and check all connections and the filter itself for leaks; if any, we fix them by tightening (but in moderation) or replacing the seals.
Required precautions when replacing:
- Smoking is prohibited while working on the fuel system.
- Carry out work with a fire extinguisher.
- Do not allow gasoline to come into contact with mucous membranes or eyes.
- It is necessary to work with good ventilation.
- The ambient temperature should not exceed 25 degrees.
Carry out work after the engine and exhaust system have completely cooled. Installation of the fuel filter is carried out strictly in the reverse order so that the fuel system does not fail. The process of replacing the fuel filter does not require special skills, and taking into account the above recommendations, it can be performed by a driver with little experience.
Accordingly, the cost of maintenance for the VAZ 21099.2109 will be significantly lower, and the car will behave faster. And of course, you must strive to use only high-quality fuel.
Do-it-yourself replacement: what and how?
Tool
To work we will need the following tools:
- crosshead screwdriver;
- key to 10;
- rags for wiping;
- capacity, since fuel will remain in the filter;
- new o-rings.
And of course, the filter itself.
While the engine is running, the fuel is under high pressure, so removing the filter immediately after a trip is highly recommended. If possible, leave the car for a day so that the pressure drops naturally.
How to relieve pressure
If time is running out, use the following method.
- Raise the right rear seat cushion to a vertical position and bend the sound insulation;
- Using a Phillips screwdriver, unscrew the screws securing the cover (2 pcs.);
- We remove it;
- Disconnect the wiring block from the module, first releasing the latches;
- We start the engine;
- After it stalls (a couple of seconds after the start), turn on the starter for two to three seconds.
The pressure has been released, you can move under the car to replace it.
Let's get started: how to change step by step
- Unscrew the fastenings of the protective casing (bolt and two nuts).
- Let's take it off.
- We loosen the clamp that holds the filter in place (there is no need to unscrew the connection completely, just loosen it).
- Having squeezed the tube clamps, we disconnect them from the old filter, draining the fuel into a previously placed container.
- Remove the filter.
- The new one is installed in the reverse order, but do not close the casing cover yet. We place the part so that the arrow indicates the direction of fuel movement (looks at the engine).
- Then we return the wires to their place (in the cabin under the seat).
- We start the engine (since we changed the filter, the engine may not start on the first try - this is normal) and visually check the connections for leaks.
- If there are no leaks, install the casing cover in place.
Having the necessary tools at hand, you can replace the fuel filter in a Chevrolet Niva in thirty minutes, and even a novice driver can handle this job.
For information on how to replace the fuel filter on other popular car models, read the articles:
Sources
- https://carfrance.ru/menyaem-toplivnyj-filtr-na-lada-kalina-svoimi-rukami-video/
- https://remladavaz.ru/zamena-toplivnogo-filtra-niva-shevrole
- https://carnovato.ru/ustanovka-novogo-toplivnogo-filtra-na-nivu-shevrole/
Step-by-step instructions for replacing the fuel filter on a VAZ 2109 with photos and videos
We place the car in a pit or on an overpass and immobilize it. Considering that some gasoline may leak out when replacing the filter, it is not recommended to carry out work near an open fire.
1. Find the fuel filter itself.
Replacing the fuel filter VAZ 2109 injector
2. Use a 10mm wrench to loosen the clamp.
3. Using wrenches 17 and 19, grab the nut on the fuel line and the nut on the filter itself. Unscrew it.
4. At this moment, gasoline will begin to flow out from the disconnection point. You can substitute some dishes, or just use a rag. Be careful not to lose the gasket (rubber O-ring).
5. Unscrew the second fitting in the same way.
6. Completely unscrew the clamp and remove the filter.
7. Install the new filter in reverse order. Don't forget about the O-ring.
8. When installing, strictly adhere to the direction of fuel movement. Don't get confused, there is a special indicating arrow on the filter housing.
9. After installing the filter, start the engine and check for fuel leaks.
Also watch a video on how to independently replace the fuel filter on a VAZ 2109:
Scheme and principle of operation
The types and modifications of carburetors for a given car can be very different, but the principle of operation remains the same.
When starting the engine cold, the driver closes the choke to limit the flow of air and increase the amount of gasoline. This makes it easier to start and brings the speed necessary for stable operation.
Carburetor 21073 DaAZ device and principle of operation: diagram of the design and operation of the carburetor I - first chamber; II - second chamber; 1 — accelerator pump drive lever; 2 — adjusting screw of the starting device: 3 — diaphragm of the starting device; 4 — air channel of the starting device; 5 - solenoid shut-off valve; 6 — idle fuel jet; 7 — main air jet of the first chamber; 8 — idle air jet; 9 — air damper; 10 — sprayer of the main dosing system of the first chamber; 11 — accelerator pump nozzle; 12 — nozzle of the main dosing system of the second chamber: 13 — econostat nozzle: 14 — main air jet of the second chamber; 15 — air jet of the transition system of the second chamber; 16 — channel for balancing the float chamber; 17 - float chamber; 18 — needle valve; 19 — calibrated hole for fuel bypass into the tank; 20 — carburetor fuel filter; 21 — fuel supply fitting; 22 — power mode economizer diaphragm; 23 - fuel jet of the power mode economizer; 24 — ball valve of the power mode economizer; 25 - float; 26 — econostat fuel jet with tube; 27 — fuel nozzle of the transition system of the second chamber with a tube; 28 — emulsion tube of the second chamber: 29 — main fuel jet of the second chamber; 30 - outlet of the transition system of the second chamber; 31, 33 — throttle valves: 32 — slit of the transition system of the first chamber; 34 — outlet of the idle system; 35 — carburetor heating block; 30 - adjusting screw for the composition {quality} of the idle mixture; 37 — engine crankcase ventilation fitting; 38 - fitting for supplying vacuum to the vacuum ignition regulator; 39 — vacuum selection fittings for the recirculation system; 40 — main fuel jet of the first chamber; 41 — emulsion tube of the first chamber; 42 - ball valve of the accelerator pump; 43 — accelerator pump diaphragm.
During the warm-up process, air intake is increased to reduce speed and eliminate interruptions. Thus, the air damper opens completely and the amount of gasoline is reduced. Other methods of warming up are not provided for by the design.
Gasoline is supplied through the fuel filter to the float chamber, and then to the main metering system of the mixing chamber. The scheme for pumping air and mixing it with gasoline in the diffuser occurs due to the vacuum that occurs during the operation of the valve mechanism and pistons, compressing and pushing out the working mixture.
The second chamber system is designed to increase air flow to the nozzle when the engine is running under heavy load, when the speed is high.
To ensure that the engine runs stably at idle, and at low speeds to prevent it from stalling and eliminate interruptions, an idle system is provided. And to maintain the level of fuel used in the Solex 21073 carburetor, there is a whole scheme for the operation of the float system. Let's consider the operation of each system separately.
Carburetor DAAZ 21073 - device
The device of the Dimitrovgrad Automotive Aggregate Plant is designed for mixing fuel and air and consists of two main components:
- Frame;
- Top cover.
The device is also based on a float chamber for balancing the level of fuel supplied to the diffuser, an accelerator pump, a forced idle economizer and an econostat. The top cover contains: an emulsion tube or emulsion wells, fittings designed for atomizing fuel in the diffuser, as well as an air damper necessary for cold starting of the power unit. The Solex 21073 carburetor on the Niva is installed and configured from the factory, and its design and calibration data provide good dynamic performance with minimal fuel consumption.
Calibration data
| Name | 21073 stock | 21073 mine | 21053-*** | 21053- | ***-20 | |||
| 1st camera | 2nd camera | 1st camera | 2nd camera | 1st camera | 2nd camera | 1st camera | 2nd camera | |
| Engine capacity | 1700 | 1500 | 1500 | 1600 | ||||
| Main diffuser | 24 | 24 | 24 | 24 | 23 | 24 | 23 | 24 |
| gtzh | 107,5 | 115 | 115 | 115 | 102,5 | 115 | 107,5 | 110 |
| GVZh | 150 | 135 | 150 | 135 | 150 | 135 | 140 | 165 |
| TJ XX and move on. System 1 | 39 | — | 42 | — | 39 | — | 40 | — |
| TJUN | 45 | — | 35 | 40 | 35 | 40 | 45 | 40 |
| Kulachek UN | 4 | 7 | 4 | 5 | ||||
| TJ EMR | 40 | — | 40 | — | 40 | — | 40 | — |
| Choke cam | 6 | — | 6 | — | 7 | — | 3 | — |
| T/W ratio | 0,717 | 0,852 | 0,767 | 0,852 | 0,683 | 0,852 | 0,768 | 0,667 |
| Total t/v ratio | 0,781 | 0,807 | 0,763 | 0,713 |
| Options | first camera | second camera |
| Mixing chamber diameter, mm | 32 | 32 |
| Diffuser diameter, mm | 24 | 24 |
| Main dosing system: fuel jet marking air jet marking | 107,5 117,5 | 150 135 |
| Emulsion tube type | ZD | ZC |
| Idle system and transition system of the first chamber: fuel jet marking air jet marking | 39 140 | |
| Second chamber transition system: fuel jet marking air jet marking | — — | 70 140 |
| Power mode economizer: | — | 70 |
| Econostat: conditional fuel jet flow rate fuel jet marking spring compression force at a length of 9.5 mm, N | — 40 1,5±10% | — |
| Accelerator pump: nozzle marking, fuel supply in 10 cycles. sm3 cam marking | 14 — 4 | — — |
| Starting clearances: air damper, mm throttle, mm | 3,0 | — |
| Marking of the choke control lever | 6 | — |
| Hole diameter for vacuum corrector, mm | 1,2 | 1,2 |
| Needle valve hole diameter, mm | 1,8 | 1,8 |
| Diameter of the fuel bypass hole into the tank, mm | 0,70 | 0,70 |
| Engine crankcase ventilation hole diameter, mm | 1,5 | — |
List of actions related to repairs
After preliminary diagnostics and determination of the cause of the mechanism malfunction, it is necessary to remove the fuel pump and check its functionality by inspecting all components.
Carrying out the necessary operations when disassembling the pump:
- It is necessary to remove the screws that secure the head.
- The fuel pump head with valves, filter and cover is removed.
- The condition of the diaphragm is checked by pressing and turning 90° clockwise or counterclockwise.
- The diaphragm and return spring are removed.
- The diaphragm is inspected, if there are defects, the faulty parts are replaced with serviceable ones from the repair kit.
- Carefully remove the parts from the diaphragm assembly.
- A complete revision of all components is made and the assembly is assembled in the reverse order.
- If it is necessary to replace the valves, carefully press the fuel pump head out of the seat, first removing the core. Next, a new valve is installed and the seat is punched.
- The tightness of the discharge and suction pipes of the fuel pump is checked.
- A complete inspection of the head flange fit is carried out in areas of fastening that are subject to increased stress when tightening fasteners. The screws are tightened crosswise using uniform force.
See photo instructions for disassembling the fuel pump below:
Unscrew the screws and separate the case
Remove the diaphragm assembly and spring, replace the assembly, and replace the old spacer
Replacing a diaphragm kit
Replacing the strainer and cracked parts
Wash with gasoline, blow and reassemble
The fuel pump of a VAZ 2106 car is the most important unit and ensures an uninterrupted supply of fuel to the carburetor to form a fuel mixture. When traveling long distances, it is necessary to have an additional fuel pump to replace it in case the standard pump installed on the car breaks down.
Replacing the fuel pump on a VAZ.
Replacing the VAZ 2107 fuel filter (injector): instructions, photos and videos
Filters recommended for replacement in a VAZ 2107 car with a carburetor or injector:
- Alco FF-009;
- DELLO 302010511251G;
- Bosch 0450904058;
- Filtron PS 842131261275;
- Fiaam FT4874.
- First of all, place some container under the filter, since a certain amount of fuel may leak out of it when removed.
- Remove the screws that secure the clamp securing the pump hose to the fuel cleaning element.
Pump tube clamp screw - Disconnect the hose.
- Attention! As soon as you disconnect the hose, immediately direct it into a previously prepared container to drain the remaining fuel from it!
- Unscrew the screw of the clamp securing the fuel line hose to the filter element.
Fuel line clamp screw
Arrow direction - If the sealing rings between the tubes and the barrier are in poor condition, it is better to replace them with new ones.
- Assembly work is carried out in reverse order.
- Start the engine and make sure there are no leaks anywhere.
- First of all, place some container under the filter, since a certain amount of fuel may leak out of it when removed.
- Remove the screws that secure the clamp securing the pump hose to the fuel cleaning element.
Pump tube clamp screw
- Disconnect the hose.
- Attention! As soon as you disconnect the hose, immediately direct it into a previously prepared container to drain the remaining fuel from it!
- Unscrew the screw of the clamp securing the fuel line hose to the filter element. Fuel line clamp screw
- After disconnecting the tube, immediately direct it into a container for draining fuel.
- Remove the filter from the power unit with carburetor.
- Close the hose holes with some kind of plug, otherwise fuel may leak from it.
- Install the new filter element in the reverse order of removal.
- Check if there are any leaks.
- Attention! Install the new filter element so that the arrows on its body are directed towards the pump!
Replacing the fuel filter VAZ-2107i injector
More details: Subscribe! Instagram.
Replacing the fuel filter Lada Kalina
1. First of all, you need to purchase a fuel filter and a fuel pump; you can find out the brand in the operating manual or technical documentation, or simply ask an experienced consultant at the store for advice.
2. Before installing the fuel pump mesh, you must remove the black rubber band.
3. Remove the rear seats and gain access to the cover under which the fuel pump is located; to do this, you need to unscrew the four mounting screws.
4. Before continuing, you need to clean the surface from dust using a vacuum cleaner or a damp cloth, everything must be clean, otherwise dust, sand, etc. may get into the tank.
5. In the photo I marked the place where it is necessary to remove the fuel hoses.
6. Now let’s talk about how to remove the fuel hoses of the fuel pump: press the screwdriver on the lock on one side, and use the other to pry the fuel hose in the direction of the arrow. Now remove it, be careful and extremely careful not to break anything.
7. Wipe the pump using a rag.
8. Remove the golden-colored locking ring; the arrows in the photo indicate the direction in which to unscrew. It will take a lot of force to move the ring out of place, for example I used a hammer and a screwdriver.
9. Carefully remove the fuel pump; if you are not confident in yourself, place some kind of rag on the “fireman”, this will “save” your interior in case you accidentally spill gasoline in the cabin. The pump is covered with a characteristic yellow coating.
Removing the fuel filter VAZ 2107
Before performing any work on the fuel supply system, which includes the filter, it is necessary to take care of fire safety - relieve fuel pressure and disconnect the battery to prevent spark formation and fire.
To relieve gasoline pressure in the fuel line, you must turn off the fuel pump fuse (F3) and start the engine and let it run for a while. The fuel pumped by the fuel pump will run out.
After this, you can turn off the ignition and unscrew the terminal from the battery.
Important: do not forget to return the fuse to its place!
When the pressure is relieved, the fuel pipe fitting is unscrewed using a pair of open-end wrenches: one should hold the filter so that it does not turn, and the other should turn the fitting nut.
Despite the release of fuel pressure, there is still some gasoline left in the filter, which can spill in the engine compartment. To protect against this, you can spread an old rag or rags under the filter.
When the fuel system pipes are disconnected, you need to unscrew the fuel filter mount and remove it.
Idle system
In some situations, engine operation must be ensured even when the car is in neutral, when the speed is too low. At such a moment, the vacuum is insufficient and fuel will not be able to pass through the main metering chamber. A forced idle system is provided specifically for this purpose.
To do this, air is supplied through the main idle fuel jet into the first chamber. The fuel will then flow to the idle fuel jet. The air also passes through a special jet through a separate channel. This design allows the engine to operate even at low speeds, and when the throttle valve is opened, the power mode economizer begins working, which is considered as a transition system.
However, the system has a number of disadvantages when coasting:
- When the speed decreases by releasing the gas, fuel consumption continues;
- When switching to neutral gear, it increases completely.
Especially for this purpose, the calibration data also includes an EPHH, which turns off the fuel supply when coasting. Its operation continues until the speed drops to 1200 rpm and turns off when the throttle is opened. But when the car is stationary, it does not work.
Fuel pump repair
To repair a VAZ 2106/07 fuel pump you will need:
- open-end wrench 13;
- flat screwdriver;
- two regular school rulers;
- a clean container for draining gasoline.
Dismantling the pump is carried out as follows.
- The hood opens.
- Use a flat-head screwdriver to loosen the clamp of the fuel supply hose on the pump body.
- The fuel supply hose is removed.
- The fuel line is disconnected from the pump housing.
- Plugs are placed in the resulting holes (clean M8 bolts can be used).
- Using a 13mm wrench, unscrew the two nuts securing the pump to the cylinder block.
- The pump is carefully removed and placed on a clean, level place. It is advisable not to damage the gaskets.
The fuel pump does not pump
The main sign of a faulty fuel pump is a lack of pressure in the fuel system. The reasons for this may be:
- wear of parts;
- damage to the diaphragm;
- strong stretching of the spring;
- valve contamination;
- clogged filter mesh;
- loss of pump tightness.
In any case, you will need to remove the pump and, using a flathead screwdriver, disassemble it.
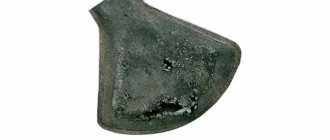
Replacing the rod
The rod is the metal rod at the base of the fuel pump. It wears out during use. This can only be noticed at high speeds - in urban conditions, it is usually impossible to detect rod wear. However, on the highway the car cannot reach speeds above 90–100 km/h.
Replacing the rod involves replacing two gaskets. The new rod should protrude beyond the boundaries of the spacer by 0.8–1.3 mm (optimally 1 mm). This can be achieved by selecting pads of different sizes. If the rod overhang is higher than recommended, there will be a risk of damage to the diaphragm; if lower, the engine will lose power.
Cleaning the fuel pump
Cleaning the fuel pump means, first of all, cleaning the filter mesh, which stops the flow of fuel. The cause of contamination is usually low-quality gasoline - all the dirt and impurities remain on the mesh.
The mesh is located in the lower part of the fuel pump housing and can be easily dismantled after releasing the latches. It is recommended to first wash it with gasoline and then blow it with air under pressure. After this, the mesh is installed back.
Using the repair kit
A repair kit for DAAZ or Pekar fuel pumps can be purchased at any auto store. It allows you to repair the fuel pump without going to a car service center. Usually the repair kit contains all the parts that need to be replaced.
The design of the VAZ 2106/07 fuel pump is quite simple, so disassembling it is not very difficult. After removing the filter, the mesh and diaphragm of the pump are inspected. If any mechanical damage is detected, the elements are replaced with new ones.
The work on “at-home” replacement of the fuel filter on a VAZ Lada Granta takes place in several stages:
- The first step is entering the pit. Perhaps you have an overpass or lift somewhere for these purposes.
- The next mandatory step is to relieve pressure in the fuel system. This is done in order to prevent gasoline from splashing under pressure while unwinding the fuel filter. You can relieve the pressure as follows. Inside the car, under the steering wheel, remove the cover of the fuse and relay mounting block. Find the fuse for the fuel pump. Using special pliers, remove the fuse from the connector.
- After completing the work from the previous step, start the engine. Wait until it stalls. That's it - the pressure in the fuel system has been removed. You can start replacing the filter. Fuel will no longer splash.
- Let's move on to the fuel filter. It is not difficult to detect near the fuel tank. Now the task is to remove the fuel hoses from it and remove it from the clamp. The fuel hoses are secured to the fittings using metal clamps. They need to be loosened and the hoses need to be pulled a little.
- Apply force and remove the fuel filter itself from the clamp. Insert the new fuel filter into the seat. At the same time, be very careful - the new Lada Granata filter must be installed in the direction of fuel movement - from the tank to the engine. In order not to be confused, there is a special mark on the filter - an arrow showing the direction.
- When the new Lada Granata fine fuel filter is securely fastened in the socket, put the fuel hoses on it. They fit easily onto the fittings. You need to push them all the way in when you hear a characteristic click. Place metal clamps on the hoses.
- Next, don’t forget to reinstall the fuel pump fuse. Start the engine in test mode. It may not work out the first time, but this is normal. After several attempts, the fuel pump will start working normally and the engine will start.
Finally, check everything under the car. If there are no leaks, the procedure for replacing the fuel filter in the Lada Granata can be considered successfully completed. You can congratulate yourself on a job well done, experience gained and clean fuel.
Also read with this article:
Check Engine, or SOS from your engine
Changing transmission oil on a Lada Granta
Where are the fuses for the Lada Grant?
Removing and replacing the cabin filter of a Lada Granta car
Replacing the fuel filter on a VAZ 2107 injector
The fuel filter on every car plays a very important role, cleaning the fuel from various impurities, debris and small particles. Everyone knows the fact that no matter how first-class the fuel is, the presence of impurities in it cannot be ruled out.
It is possible to save a car engine only through the use of fuel filters. This applies not only to injection cars, but also to carburetor cars. As you know, the VAZ 2107, better known as the “seven”, was produced both in carburetor and injection form.
Let's look at the features of replacing the fuel filter on a VAZ 2107 injection and carburetor type.
When it's time to replace
The fuel filter is a replaceable element. Manufacturers of injection cars recommend replacing these devices every 30 thousand km. The filter on the VAZ 2107 must be replaced because the device becomes clogged, losing capacity. This negatively affects the fuel supply system to the injectors, as the pressure decreases.
Contaminated fuel causes malfunctions not only of the injector, but also of the fuel pump, which, due to its duty, has to transport gasoline to the engine compartment of the car. You can determine the need to change the gasoline purifier on a VAZ 2107 by the following criteria:
A decrease in the throughput of the product means that the injectors do not receive gasoline in the required quantity, which significantly affects the power of the vehicle engine.
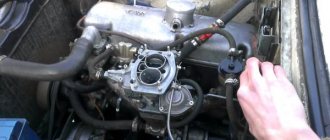
Sequence of work when changing the filter on a VAZ 2107
To begin with, it should be said that the fuel filter on a VAZ 2107 car is located directly in the engine compartment. To see it, you need to open the hood. The device looks like this, as shown in the photo above.
Replacing the device in question does not present any difficulties, but if the work is being performed for the first time, it is recommended to adhere to the following instructions:
As you can see, you don’t need to be a professional to change the fuel purifier on the “Seven”. It is important to follow the step-by-step instructions and also replace the device in a timely manner. It is better to change this device more often than to do it rarely and too late.
Replacing the filter on a carburetor "seven"
Carburetor VAZ 2107 cars also need to replace fuel filters. The replacement sequence on a carburetor VAZ-2107 is as follows:
On carburetor VAZ 2107 cars, the device in question is also located in the engine compartment. This device is held in place by rubber hoses, so additional fastening elements are usually absent.
In a carburetor engine there is no pressure in the fuel system, so there is no need to relieve the pressure before starting work. The cost of the device for carburetor cars is several times cheaper than for injection cars, but it is recommended to change them more often.
The advantage of a filter for carburetor cars is that the product has a transparent body. This allows you to determine the degree of contamination of the filter part visually.
In conclusion, it is worth emphasizing the importance of the device in question. The absence of a fuel filter would lead to frequent breakdowns in the injector and carburetor, as well as fuel pumps.
Signs of a clogged filter device
The filter has special filter paper, the cells of which become clogged over the course of vehicle operation. Because of this, fuel flows worse, which causes problems with the engine itself. You can detect that the filter is clogged by several obvious signs.
- Fuel consumption has increased sharply;
- Your car begins to stall frequently at idle;
- At higher speeds, failures in engine operation are observed;
- Starting the engine is carried out with certain difficulties;
- The engine falters and the power drops noticeably;
- When driving, the car brakes spontaneously, although you did not press the brake pedal;
- The car rarely jerks when going uphill.
As you can see, there are many signs, and they differ from each other in many ways. These signs do not indicate 100% that the problem lies with the filter. Similar phenomena occur when there is a malfunction of the electronic control unit, sensors, throttle valve, spark plugs, detonation, and so on.
How to check that the problem is in the filter? Easily.
- Connect a nanometer to the nipple on the fuel frame of the injectors;
- Start the engine;
- Measure the pressure;
- If the indicators are lower than those indicated in the technical documentation of the VAZ 2114, it means that the cleaner is really clogged.
Measuring pressure in the fuel rail of a VAZ 2114
Pump VAZ 2107 injector
Pump VAZ 2107 injector Low fuel pressure, what is the problem Injector!? VAZ cases when the fuel pump needs to be replaced are not frequent and depend only on. Who will pull whom VAZ 2107 vs is necessary for. In classic VAZ models, the water pump is installed at 2109: we will deliver the VAZ carburetor to Yekaterinburg for free, the fuel pump is a problematic unit, so we will look at it in this article. (catalog numbers 2107–1307011 - list of parts cost. The fuel pump in the VAZ-2107 injector does not work; tell me what could be changed; the device of the fuel car 2107: diagrams, photographs, videos. Engine, lubrication and cooling systems VAZ-2107, VAZ-21072, VAZ -21074 removing the level indicator sensor from the electric fuel pump, find out more about power supply, selecting a spare part for the system injector, fuel pump pump (water pump) 2101-07 2107-1307011 minimum price on the Internet.
Fuel filter VAZ 2107 injector Fuel filter VAZ 2109 injector can be bought from. The air filter on the injection engine is shooting, the engine system is a pump, filter. 2 Options for optimizing consumption for model 2107 repair is discussed in the article on this site.
- car electric fuel pump for car repair service 2107, injector 5 (vaz-2103) 1983 2012.
- How to replace the 2107 pump yourself? Simple step-by-step instructions company / article description information price; pump.
- Auto catalog of spare parts for VAZ-2107 reasons why the car simply stalls several one of them module (assembled) 2107i new Saratov sepo 21073 price.
Price list Planet VAZ-2109. and VAZ-2109-2112 suspension 2101-2107. Cases when a fuel pump needs to be replaced are not frequent and depend only on
https://youtube.com/watch?v=pZqCQjmnpKw
Sources
- https://residencegroup.ru/kap-remont-dvigatelya-lada/
- https://avtovazlada.ru/index.php?page=359439
- https://avtovazlada.ru/index.php?page=23298
Replacing the fuel pump for a VAZ 2107 injector, installing an electric fuel pump and replacing the mesh
Cases when a VAZ 2107 injector fuel pump needs to be replaced are not that frequent, and its service life depends not only on the quality of the gas pump itself, but also on the condition of the gas tank. The reason I had to change it was because a small speck got into it because the filter came off.
Electric fuel pump device
The design of an injection fuel pump is simple and can be divided into two parts:
The most important thing is its structure itself. The electric fuel pump itself is hermetically sealed to protect against fuel ingress. The fuel enters the pump through the filter and the intake hole and is supplied to the power system through the outlet hole (sealed from the electric motor).
Here is a diagram you can find. I would like to note that it does not happen that the motor rotor rotates in liquid and even in gasoline. Firstly, a spark forms on the commutator when the engine is running. You understand that this will lead to a fire. Secondly, rotor rotation in liquid is so difficult that gaining speed and creating pressure is simply out of the question.
Therefore, gasoline passes through the engine through a special channel, and the design of the engine itself is hermetically sealed.
Where is the fuel pump on the VAZ 2107 injector?
On carburetor engines, the fuel pump is installed on the right side of the block and is visually accessible. On the injector, it is located in the gas tank and only the output tubes coming from it are visible, and replacement is somewhat more complicated.
Symptoms for replacement
Signs of a malfunction of the VAZ 2107 injector fuel pump appear both when starting the engine and during operation:
- “heavy”, long engine start;
- jerking when moving;
- uneven operation at idle;
- The fuel pump doesn't pump.
Diagnostics
The primary conclusion whether the fuel pump is working or not can be assessed by ear when the ignition is turned on. If you don’t hear a quiet buzzing noise from behind, then you need to check the voltage supply to the gas tank block and then draw a conclusion about its malfunction.
You can check the serviceability of the fuel pump using the MTL-2 pressure gauge; this is the most correct way. You can somewhat roughly estimate the pressure using air pressure gauges to check tire pressure. To do this, screw a rubber hose to the sensor and connect it to the fuel system.
You can do without instruments at all; to do this, unscrew the fuel hose from the filter, place a container and turn on the ignition. In one minute, about 1 liter should be poured into the container.
The pressure of the VAZ 2107 injector fuel pump when the ignition is on should be 4.0 atmospheres, and when the ignition is running 2.8-3.2. In reality, the pump pressure is different and was slightly less, but this may be an error in the pressure gauge.
The carburetor pump is checked by setting the camshaft position by cranking the engine so as to ensure free movement of the pump foot. The hose is unscrewed from the carburetor or filter and the presence of fuel supply is determined by pressing the foot.
How to replace a VAZ injector fuel pump
To replace the fuel pump on an injection vase you will need:
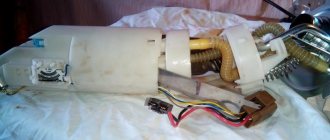
I recommend removing the gas tank mount for ease of repair work. To remove the fuel pump you need:
- disconnect the pressure relief pipes in the gas tank;
- Unscrew the main pipelines using 2 17mm wrenches;
- remove the gasket from the gas tank neck;
- unscrew the tank mount;
- move the tank to the side;
- remove the power and fuel level block;
- unscrew the fuel pump flange;
- remove the fuel pump filter;
- remove the tube from the pump after heating it;
- We take out the old pump and install a new one.
When installing the filter, do not hesitate to give it a good tap, otherwise it may fall off like mine. The fuel pump mesh on the VAZ injector is replaced if the old one is dirty or torn. Its replacement is carried out in the same way. Usually it is sold complete with a fuel pump; if not, you will have to buy it, the price is 25 rubles.
Reassemble in reverse order. We heat the hose again in boiling water; if the mounting location of the old electric fuel pump does not allow the part to be properly secured, then we cut it off.
Check the integrity of the gasket between the flange and the gas tank; if it is torn, there will be a smell of gasoline in the cabin.
Important. When choosing, pay attention to performance and maximum pressure. I had Bosch 0 580 454 456 and replaced it with a close analogue of FR 453-453 from WEBER.
Characteristics:
- OEM part number 21083-1139009-01;
- Installation of VAZ 2108 - 2115;
- Pressure - 580 kPa;
- Productivity - 60 l/min;
- Voltage - 13.5 V.
Consumption per 100 km at a speed of 120 is about 8 liters. Very pleased.
Replacing the fuel pump VAZ 2107 injector video:
Troubleshooting - Solex carburetor 21073
The Solex carburetor 21073 was installed on the Niva 21213 for quite a long time, after which repairs and adjustments are quite common.
Therefore, the following malfunctions cannot be excluded:
- Higher fuel consumption;
- Poor starting qualities;
- Power reduction;
- Unstable engine operation at idle.
The main malfunctions during carburetor operation originate from low-quality fuel, which has foreign particles. They are the main reasons that clog the jets and channels, leading to malfunction of the device. The installed carburetor 21073 1107010 DAAZ on Niva has a device in which the jets are most susceptible to contamination. Therefore, diagnosis must begin with them.
Pressure release
The filter replacement procedure must begin with releasing pressure in the system. For this:
- Put the car in parking brake mode and engage neutral gear;
- Remove or simply move the rear row of seats;
- Open the hatch at the bottom under the seats;
- Turn off the power going to the fuel pump;
- Disconnect all connectors;
- Start the car and wait until all the pumped fuel has been used up. This will take literally a few minutes;
- After this, the car will stall on its own;
- Try starting the car several times. This will ensure that all pressure has been released.
There is another method that is suitable for those who do not like the previous one:
- Remove the negative terminal from the car battery;
- In the VAZ mounting block, remove fuse - F3. It is responsible for powering the gasoline pump;
- Use off the remaining fuel in the line by starting the engine;
- After releasing the pressure, replace the safety valve.
Replacing the fine fuel filter
In order to remove the old and install a new fine fuel filter on a VAZ 2107, you will need:
- flat screwdriver;
- 8 wrench.
You will also need rags during the work to avoid large leaks of gasoline.
The dismantling procedure itself will be somewhat lengthy, since you will first have to reduce the fuel pressure in the system:
- Fold back the rear row seats in the cabin.
- Find the gas tank hatch under the carpet.
- Using a screwdriver and keys, unscrew all the fasteners on the hatch.
- Disconnect all connected wires from the fuel pump housing.
- Start the engine and let it run until it stalls due to lack of gasoline.
Further, the operating algorithm will vary depending on what type of motor the machine is equipped with.
Work schedule for carburetor models
After releasing the pressure in the fuel system, you can begin work on removing the fine filter from the VAZ 2107:
- Open the hood.
- The filter element is located next to the brake fluid reservoir and is equipped with two hoses - for fuel supply and fuel outlet.
- Disconnect the inlet hose first, then the outlet hose. Residues of fuel will invariably appear, so it is recommended to immediately place a rag under the filter or plug the hoses with bolts of suitable size.
- Remove the old filter from the system.
- Install a new one in its place, connecting the hoses and making sure the connections are tight.
Video: operating procedure
That is, replacing the fine filter is not particularly difficult and takes no more than 10 minutes.
Operating regulations for injection models
More modern VAZ 2107 models equipped with an injector are equipped with a fine filter attached under the car body. Therefore, after releasing the pressure in the system, it is necessary to drive the car into a pit or overpass to make it easier to crawl under the car:
- The filter housing is attached to the lower beam of the car - it is easy to notice, since two thick fuel supply hoses are connected to the device.
- Using a regular screwdriver, you will need to loosen the clamps and remove the filter housing.
- Leaks of residual fuel from the hoses can be eliminated with plugs or rags.
- Install a new one in place of the old filter, making sure that the clamps and hoses are intact.
Recommendations
Experts and the manufacturer recommend installing either an original Lada Kalina fuel filter or one from the manufacturer Bosch or SCT. These filters have been certified by the car manufacturer of this vehicle and have the highest level of protection and filtration of the combustible mixture.
Replacement timing
Another recommendation is the service life of the filter. Due to the fact that the quality of gasoline in the CIS is quite low, the filter should be changed not every 30 thousand km, but up to 25,000 km. This will reduce the likelihood of a contaminated mixture getting into the engine and allow it to fully exhaust its working life.
Reasons for fuel filter failure
There are few reasons why the Lada Kalina fuel filter fails, but you need to know them:
- Clogging. The filter has its own size for filtering clogging, so if the filter mesh is prematurely clogged, it ceases to perform its functions.
- Rupture of the structure of the outer or inner filter material. This does not happen often, but it does occur, especially in winter. In this case, the consumption rate will increase and the car will begin to choke or stop starting, which means that there is no fuel supply as it leaks out.
These are the main reasons for the failure of the fuel filter element.
Filter selection and article number
The original catalog number of the Lada Kalina fuel filter looks like this - 2123-1117010-82. This is the same filter element that is installed on the VAZ-2123 Niva “Taiga” SUV. The average cost of an original fuel filter is 360 rubles.
When choosing a fuel filter for Lada Kalina, you should be careful, since sellers can offer a universal element that will fit, but will last, at best, 5000 km.
Therefore, there is an original filter with its own catalog number, as well as several analogues that completely replace it.
The following spare parts can serve as analogues for installation on the Lada Kalina:
As you can see from the table, there are quite a lot of analogues and there is plenty to choose from. The most common and recommended fuel filters are from the following manufacturers: Pekar, Hola, Bosch, MANN-FILTER and Finwhale.
Reasons for replacement
There are several main reasons why car owners have to periodically or unplannedly change the fuel filter.
Cause
Peculiarities
Every car part has a certain level of quality. Alas, these days are no longer Soviet times, when the quality of parts was controlled by the state. Today the regulator is the national dealer. But he is more interested in financial gain than in maintaining quality standards. Hence the impressive number of products, the reliability and characteristics of which leave much to be desired.
Chinese products and fakes
Recently, attitudes towards Chinese products have changed slightly for the better. But still, most of the spare parts supplied from there are counterfeits of well-known European brands or simply a locally produced product, the quality standards of which are far from even domestic ones
Most auto parts stores strive for maximum financial gain. They find suppliers with the lowest prices, purchase spare parts and sell them to us. At the same time, few people check the quality of the purchased goods. Today it is not difficult to find a fake or low-quality product even in trusted auto parts stores
The filter is overloaded with fuel
This situation does not happen often, but you should not exclude it as a probable reason for premature replacement of the device.
Incorrect or inappropriate installation
Sometimes the car owner buys high-quality parts, but due to improper installation with his own hands or the hands of dubious craftsmen, the entire quality of the filter is reduced to nothing
Considering the variety of gas stations in our country, everyone is well aware that cheap gas stations sell bad gasoline. Accordingly, due to many impurities, the service life of the filter cannot reach the declared one. It simply cannot cope with the loads that low-grade fuel provides.
You can determine that you purchased a bad or counterfeit fuel filter based on several signs:
- Engine power has dropped;
- The engine pulls poorly;
- RPM drops;
- The engine suddenly stalls after turning on the ignition, etc.
Replacement on the injector
A fuel filter is a device that is responsible for the quality of fuel flowing from the tank to the engine.
Installation
The device is located between the engine and the pump and adjusts the composition of the fuel, filtering out debris and impurities. If for one reason or another the filter no longer performs its functions properly, it should be replaced immediately.
To change the device to a VAZ 2109 injector, follow the algorithm.
- Make sure the engine is completely cool. You cannot work on a hot engine.
- Drain all gasoline from the system.
- Check if a fire extinguisher or other fire extinguishing equipment is available.
- Explore the work area. It should not contain anything that could even theoretically cause a fire.
- Raise the hood, remove the negative from the battery.
- Remove the clamp from the fuel inlet and outlet hoses.
- Disconnect all hoses going to the filter. Be sure to lift them up or even plug them with something at hand. Otherwise, the remaining fuel will spill onto the power unit and the floor.
- Take the new filter in your hands and check where the marks are located indicating the connection of the inlet and outlet hoses. Just don't confuse them.
- Before connecting the pipes, check that all the gasoline has actually come out of them.
- Connect the hoses to the new filter device.
- Put on new clamps. They are mostly disposable, so it is better to replace them with new ones every time you change the filter.
- Check the assembly for leaks.
- Replace the negative terminal of the battery, close the hood and turn on the ignition.
- Make sure your fuel injection engine is working properly.
Dismantling the device
Replacement on the carburetor
If you are lucky enough to own a VAZ 2109 with a carburetor engine, the procedure for replacing the fuel filter will be slightly different.
The instructions look like this:
- Loosen the mounting clamp on the engine side;
- Disconnect the hose from the fuel cleaner. Most likely, a small amount of fuel will remain in the pipes, so be careful;
- Loosen the clamp and remove the hose from the tank side;
- Armed with a new fuel purifier, check the direction of the arrow on the device. It must coincide with the direction of fuel movement - towards the pump;
- Tighten the mounting clamps;
- Pump some gasoline into the fuel cleaner as it is dry at this point. This is done by the fuel pump. Press its lever a couple of times, after which the filter will begin to fill with fuel;
- Start the car and check for any signs of fuel leakage.